Is it possible to print with metal?

Is it possible to print with metal?

Printing metal parts

At dddrop we continue to develop. So we are also exploring the possibilities for metal printing. The dddrop EVO Twin allows you to print full Stainless Steel parts at very competitive prices. dddrop developed parts, like special nozzles, to durable print the metal parts. Parts are 3D printed with a special metal filament: BASF Ultrafuse 316LX. After the 3D printing stage, the de-binding and sintering process is almost equal to the MIM (Metal Injection Moulding) pocess. The end result is a true and high quality Stainless Steel 316L part.

Are you interested in metal printing? Please let us know, we would like to explain all possibilities:

Contact us

How do I keep my nozzle running smooth?

How do I keep my nozzle running smooth?

3D printing is a remarkable technology that brings ideas to life, layer by layer, creating objects right before our eyes. However, like any technology, it comes with its challenges. One such challenge that many enthusiasts and professionals encounter is 3D printing clogging. This issue can halt production, leading to wasted time, resources, and, of course, the frustration of having to troubleshoot and fix the problem. In this guide, we delve into the common causes of 3D printing clogging, how to prevent it, and what to do if your printer nozzle becomes clogged. Join us on this journey to ensure a smoother 3D printing experience.

Common Causes of Clogging

Understanding what leads to 3D printing clogging is the first step towards finding a lasting solution. Here are some prevalent causes:

  • Filament Quality: Low-quality or contaminated filament can introduce foreign particles into the nozzle, causing clogs.
  • Nozzle Alignment: Misaligned nozzles can scrape against the print, accumulating material that eventually leads to clogging.
  • Temperature Settings: Inadequate temperature settings can either cause the filament to burn and stick to the nozzle or not melt sufficiently to flow smoothly.

In the next section, we will explore preventive measures to keep your 3D printing operations running clog-free.

Preventing Clogs

Prevention is better than cure, especially in the realm of 3D printing. Here are some proactive steps to combat 3D printing clogging:

  • Regular Maintenance: Regular cleaning and inspection of your nozzle will help catch potential issues before they escalate.
  • Choose the Right Filament: Opt for high-quality, contaminant-free filaments that are suited for your printer’s specifications.
  • Proper Settings: Ensure your printer’s temperature and speed settings are optimized for the material you are using to prevent overheating or underheating, which could lead to clogs.

Unclogging Your 3D Printer

At some point, you might encounter 3D printing clogging despite your preventive measures. When this occurs, it’s crucial to address the clog efficiently to resume your printing projects. Here’s a step-by-step guide to unclogging your 3D printer: 

  1. Identify the Clog: Determine the extent and location of the clog.
  2. Heat the Nozzle: Warm up the nozzle to loosen the clogged material.
  3. Manual Cleaning: Use a cleaning filament or a fine needle to remove the clog gently.
  4. Cold Pull Technique: Employ the cold pull technique to eliminate any residue.
  5. Check and Realign: After unclogging, check the alignment and ensure that the filament path is clear before resuming printing.

By following these steps, you can resolve 3D printing clogging and get back to bringing your creations to life.

Understanding the Cold Pull Technique

The Cold Pull Technique is a proven method to clear away residue from your nozzle’s interior. Initially, heat the nozzle to a temperature suitable for your filament type, then cool it down slightly below its normal printing temperature. Insert the filament and allow it to cool further. Once cooled, pull the filament out with a swift, steady motion. The idea is that the filament adheres to any residue within the nozzle, and pulls it out when removed. This technique is highly effective in preventing and resolving 3D printing clogging, ensuring a clean nozzle for a smooth printing experience.

The Right Tools for the Job

Having the right tools at your disposal can significantly ease the process of maintaining a clog-free 3D printer. Here are some recommended tools and accessories:

  • Cleaning Filaments: Special filaments designed to clean the nozzle from the inside.
  • Nozzle Needles: Fine needles can help dislodge clogs from the nozzle.
  • Nozzle Brushes: These can be used to clean the exterior of the nozzle.
  • Quality Filament: Invest in high-quality filament to reduce the chances of 3D printing clogging.
  • Temperature Gun: A handy tool to ensure your printer reaches the correct temperature.

Equipped with these tools, you’ll be better prepared to prevent and address clogging issues, promoting a seamless 3D printing experience.

Material-Specific Guidelines

Different materials have distinct characteristics that can affect how they flow through the nozzle, potentially leading to 3D printing clogging. Here are some guidelines:

  • PLA: Ensure proper cooling as PLA can become sticky when overheated.
  • ABS: Maintain a consistent high temperature to prevent the material from hardening and clogging the nozzle.
  • PETG: Clean the nozzle regularly as PETG can leave residues that harden over time.
  • TPU: Print at a slower speed to prevent this flexible material from jamming.

Adhering to material-specific guidelines can significantly reduce the likelihood of encountering clogs while working with various filaments.

Conclusion

Navigating through the realm of 3D printing comes with its fair share of challenges, with clogging being a notable one. However, with a keen understanding of common clogging causes, preventive measures, and effective unclogging techniques, you can significantly minimize downtime caused by 3D printing clogging. Equipped with the right tools and knowledge, you’re now ready to tackle any clogging issues head-on and enjoy a smoother, more productive 3D printing experience. Remember, regular maintenance and adherence to material-specific guidelines are your allies in maintaining a clog-free printing journey.

FAQ

Why does my 3D print keep clogging?
Your 3D print may keep clogging due to impurities in the filament, misalignment of the nozzle, or inadequate cleaning practices. These factors may obstruct the filament’s smooth passage, leading to consistent clogs.

What to do if your 3D printer is clogged?
If your 3D printer is clogged, disassemble and clean the nozzle thoroughly using a cleaning filament or solvent. You can also heat the nozzle to remove any residual filament.

How do I stop my nozzle from clogging?
To prevent your nozzle from clogging, ensure you use high-quality, clean filament and maintain proper alignment of the printer parts. Regular cleaning and periodic maintenance checks can also help in preventing clogs.

Why does my extruder keep clogging mid print?
Your extruder may clog mid-print due to temperature fluctuations, incorrect printer settings, or the use of incompatible filament material. It’s essential to monitor the printing process and adjust settings accordingly.

How often should you clean 3D printer nozzle?
It’s advisable to clean your 3D printer nozzle after every 10 hours of printing. However, the frequency may increase if you use materials prone to causing clogs or if you observe a decline in print quality.

Why is my 3D printer nozzle jamming?
Your 3D printer nozzle may jam due to incorrect temperature settings, a worn-out nozzle, or the use of improper filament material. Replacing or upgrading the nozzle and using the recommended filament and settings can alleviate jamming issues.

Is it possible to print with metal?

ICER: a 2m² 3D printed patron St. George

ICER: a 2m² 3D printed patron St. George

3D printing allows the creation of unique designs. As you may have seen before in the video Eric Huls [DUTCH] of Innovation Center ICER started a remarkable project: printing a two square meter model of patron St. George. After successfully printing a smaller prototype, now the real work begins…

ICER Eric Huls

Challenges

Eric is now building part for part a patron of St. George that is entirely 3D printed. Many aspects come into play: building volume, strength, finishing and weather conditions. All this needs to be taken into account during the building process. Building a 2m² that is fully 3D printed required re-approaching the design process entirely. You need to conceptualise what the final model will look like and take the 3D printed properties into account when designing the different parts.

According to Eric the project is one big challenge: “I came across several issues and I decided how to solve them on the spot. For instance, I underestimated the required time and the finishing touch. During the project I have learned that I have to slice the parts in a different way. Another challenge you need to take into account is the size of the project; I have never printed such large models with ABS and this requires a different approach than printing smaller models. You have to take the dimensions into account, so that each part fits perfectly and it becomes a whole. It is a matter of experience; you learn along the way”.

Large prints and no filament wasting

Because the prints are so big, the Filament Management Module is a big help. Each part takes about 80 till 111 hours and requires a lot of material: “You don’t want to take the risk destroying your print because of out-of-filament. Thanks to the module the 3D printer automatically switches to the second roll and it continues printing. Also, you have no more filament wasting and you can re-use and finish your filament rolls completely”, says Eric.

Current state

So far, Eric has been working on the project for about 600/700 hours. Currently he is working on the wing for the dragon. After securing the wing to the torso of the dragon, Eric will continue with the bottom part of the dragon: “I work from bottom to top”. Eric uses acetone to secure the parts. The big advantage is that there are no glue residues. Also, the gaps are filled with acetone to make the model resistant against weather influences. After securing the entire model, Eric will plaster, polish and prime the entire 3D model for a beautiful finish.

Support

Eric bought 4 dddrop 3D printers for realizing this project: “I am still very satisfied with the dddrop 3D printers. In case of any issues I receive great support from dddrop and CAD2M. They come up with solutions and give me tips to obtain the best results”.

Eric hopes the project will be finished the second week of July. This way it is finished before the local fairground and everyone can get a glance of patron St. George.

Is it possible to print with metal?

3DG-Project enters new markets with the dddrop 3D printer!

3DG-Project enters new markets with the dddrop 3D printer!

Anyone who has once bought a house in Belgium, is probably aware of the EPB certificate. This certificate is the same as the Dutch Energy Label and is required when selling a house. The company 3DG-Project BVBA is specialized in issuing these EPB certificates.

In the past, they made the EPB with 2D drawings of i.a. the insulation. Since three years 3DG uses 3D mockups instead of drawings. With the purchase of the dddrop 3D printer, 3DG also started making 3D mockups for the sale of newly constructed houses.

dddrop 3D printer review 3dg-project

“Compared with its competitors, dddrop delivers the best prints and it is still very affordable!” 

At the tradeshow RapidPro 2016 Drieskens came across several 3D printers, but in the end he chose dddrop. The building volume, closed casing, quality of the prints and the reliability were the main features why he chose the dddrop 3D printer: “When I start a print on the dddrop, I know for sure it is finished the next morning”, according to Roland Drieskens, owner 3DG-Project.

Continue reading the full story? Please click on the image below. 

dddrop 3D printer review 3dg-project

What are the advantages of a larger 3D printing volume?

What are the advantages of a larger 3D printing volume?

3D printing is becoming increasingly popular and today many companies are using 3D printing to create products. It allows companies to easily build prototypes and end-user parts and save a lot of time because they do not have to rely on a third party. Another advantage is the ability to quickly modify the prototype. When 3D printing is used professionally, a larger print volume is often desired. But what are actually the advantages of a larger print volume?

Printing the 3D model in one piece

First, a larger print volume gives the ability to print the 3D model in one piece. When a model is printed with a smaller print volume, the individual parts often have to be put together after printing. This takes more time. Second, with a smaller print volume you are dependent on a fixed scale. For example, an architect may want to display a model in a larger scale to show the details. The more you reduce the scale, the more details you lose. This is why a larger print volume is often preferred in the architecture and medical industries.

Producing in the same batch

In addition, it offers the possibility of producing multiple products in the same batch. If the intention is to produce in batch, a 30×30 cm print bed is more suitable than a 20×20 cm print bed. Producing the same batch on a smaller print bed takes more time because you have to start the print several times.

The ability to grow

Lastly, it creates the opportunity to grow. In the beginning, it is important to learn the ins and outs of 3D printing. Companies will often start by printing smaller products. During the process, they discover more possibilities and start printing for different applications. A larger volume creates more opportunities to grow.

Keep in mind that many 3D printer manufacturers only expand their build volume in height. This gives the opportunity to build larger 3D models, but only in the z-direction. However, building in the z-axis often results in a smaller footprint and sometimes causes inaccuracy. It is easier for manufacturers to expand their 3D print volume in the z-axis than in the x- or y-axis, because only the product moves in the z-axis. Adjusting in x or y direction means, among other things, adjustments in the print head, wiring and you have to deal with overhang problems.

However, in the professional market we noticed a demand for 3D printers with a larger 3D print volume both in the x-axis and the y-axis. We take suggestions from users seriously, which is why we developed the RAPID ONE. The RAPID ONE has a scalable frame. This allows users to choose which format they want in the x- and y-axis. So you can always choose a format printer that perfectly fits your production process or other challenges. For more information, please visit our dedicated product page: dddrop RAPID ONE. 

3D printing with rubber: is it possible?

3D printing with rubber: is it possible?

Can you 3D print rubber?

The realm of 3D printing presents endless possibilities with a plethora of materials to choose from. However, not all materials are fit for the 3D printing process, and rubber is one such example. The core question arises: can you 3D print rubber? The answer is a straightforward no. Rubber is a gummy material traditionally hot-pressed into a mold, where it cools down and undergoes vulcanization. Through vulcanization, rubber transitions to a solid state, retaining its shaped form. Unlike other materials used in 3D printing, rubber does not revert to a fluid state upon reheating; instead, it burns, making it unsuitable for the process. For successful 3D printing, the material must transition to a fluid state controllably, a characteristic that rubber lacks. Hence, the quest to 3D print rubber meets a dead end at the fundamental level of material properties and the inherent process of 3D printing.

What is possible?

Synthetic materials such as Thermoplastic elastomers (TPE’S) are good substitutes for rubber. TPE’s are suitable for printing. TPU filament is such TPE, it has the same flexibility as rubber but it will melt at 60°C. Rubber is an organic material: the properties of rubber cannot be affected. However, with TPU we’re able to determine for instance the hardness, the heat resistance and abrasion. We’re imitating the organic material, but we make sure to get the desired and most optimal properties.

TPE’s, including TPU, are used for various applications in the industry. You can think of shoe soles, but also industrial applications such as sealing rings are a good example.

Check the video below for an example we made with TPU (flex) filament during the Olympics in 2016:

Material Comparison

When venturing into the domain of 3D printing with the aim of creating flexible objects, the choice of material is paramount. While rubber, due to its inherent characteristics, falls short of being a viable option for 3D printing, several synthetic materials step up to fill this void. Among these, Thermoplastic Elastomers (TPEs) are prominent for their rubber-like flexibility and 3D printability. A notable member of the TPE family is Thermoplastic Polyurethane (TPU), which melds the flexibility of rubber with the meltable nature required for 3D printing. In this section, we’ll dissect the core differences between rubber and TPU, shedding light on their respective properties and how they fare in various applications.

  • Flexibility and Durability: Rubber is renowned for its elasticity and durability. However, TPU also offers a commendable level of flexibility, which can be tailored by modifying the printing parameters, a feature rubber lacks.
  • Melting Point: The necessity for a material to have a controllable melting point for 3D printing puts TPU in the spotlight. Unlike rubber that burns upon reheating, TPU melts at around 60°C, making it a suitable candidate for 3D printing.
  • Heat Resistance and Abrasion: While rubber maintains its properties across a wider temperature range, TPU’s heat resistance can be adjusted to suit the application. Additionally, TPU showcases good abrasion resistance, mimicking yet another favorable trait of rubber.
  • Organic vs Synthetic: Rubber, being organic, has a fixed set of properties. On the flip side, TPU, a synthetic material, allows for a level of customization in terms of hardness, heat resistance, and other properties, making it a versatile choice for varied applications.
  • Industrial Applications: Both materials find their places in industries, with rubber being a classic choice for seals, tires, and damping systems, while TPU shines in applications like shoe soles and sealing rings, where a balance of flexibility and printability is sought.
  • Cost and Availability: TPU’s rising popularity in the 3D printing realm has made it relatively easily available and cost-effective, especially when compared to the traditional rubber manufacturing processes.

Understanding the distinctions between rubber and TPU, alongside their respective advantages and limitations, can guide individuals and industries in making informed decisions when it comes to selecting materials for 3D printing flexible objects.

Pros and Cons of TPU for 3D Printing

Thermoplastic Polyurethane (TPU) has emerged as a go-to material for individuals and industries looking to 3D print flexible objects. Its properties provide a close resemblance to rubber while also being adaptable to the 3D printing process. However, like any material, TPU has its share of advantages and disadvantages when it comes to 3D printing. This section aims to delineate the pros and cons of utilizing TPU for 3D printing applications.

  • Pros:
    • Flexibility: TPU is highly flexible and can mimic the elasticity of rubber, making it ideal for a plethora of applications where flexibility is a requisite.
    • Customizability: The hardness, heat resistance, and abrasion properties of TPU can be tailored to meet specific requirements, offering a level of customization that is hard to achieve with traditional rubber.
    • Durable: TPU is known for its durability and resistance to abrasion, wear, and tear, which is crucial for industrial applications.
    • Recyclability: Being a thermoplastic material, TPU can be recycled, which is beneficial from an environmental standpoint.
    • Wide Range of Applications: From consumer goods like shoe soles and phone cases to industrial applications like sealing rings and hoses, TPU’s versatility is commendable.
  • Cons:
    • Printing Difficulty: Printing with TPU can be challenging, especially for beginners. It requires a well-calibrated printer and a good understanding of the printing settings.
    • Printing Speed: TPU requires a slower printing speed compared to more rigid materials like PLA or ABS to ensure accurate deposition and to prevent issues like stringing.
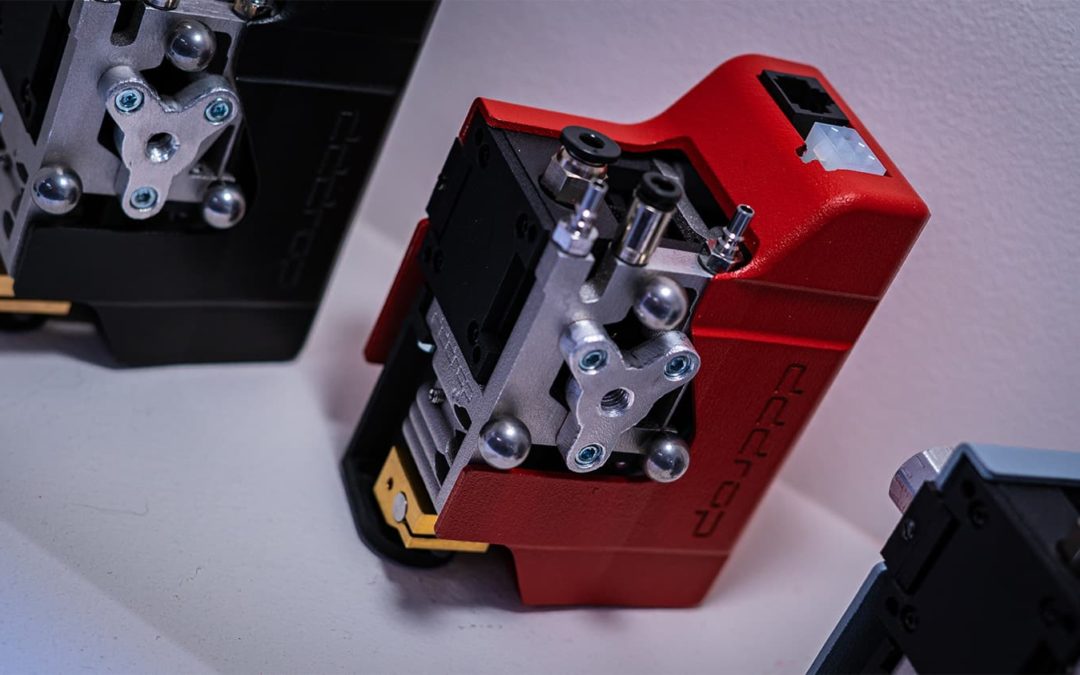
    • Printer Compatibility: Not all 3D printers are equipped to handle the flexibility of TPU. Printers with a direct drive extruder are generally better suited for printing with TPU.
    • Cost: While TPU might be more cost-effective compared to some materials, it can still be on the higher side price-wise, especially when compared to more common 3D printing materials like PLA.

Understanding the benefits and challenges associated with TPU for 3D printing can aid individuals and enterprises in making informed decisions regarding whether it’s the right material for their specific projects. With the right equipment and expertise, the hurdles associated with TPU can be navigated, unlocking its full potential in 3D printing applications.

Application Examples of 3D Printed TPU

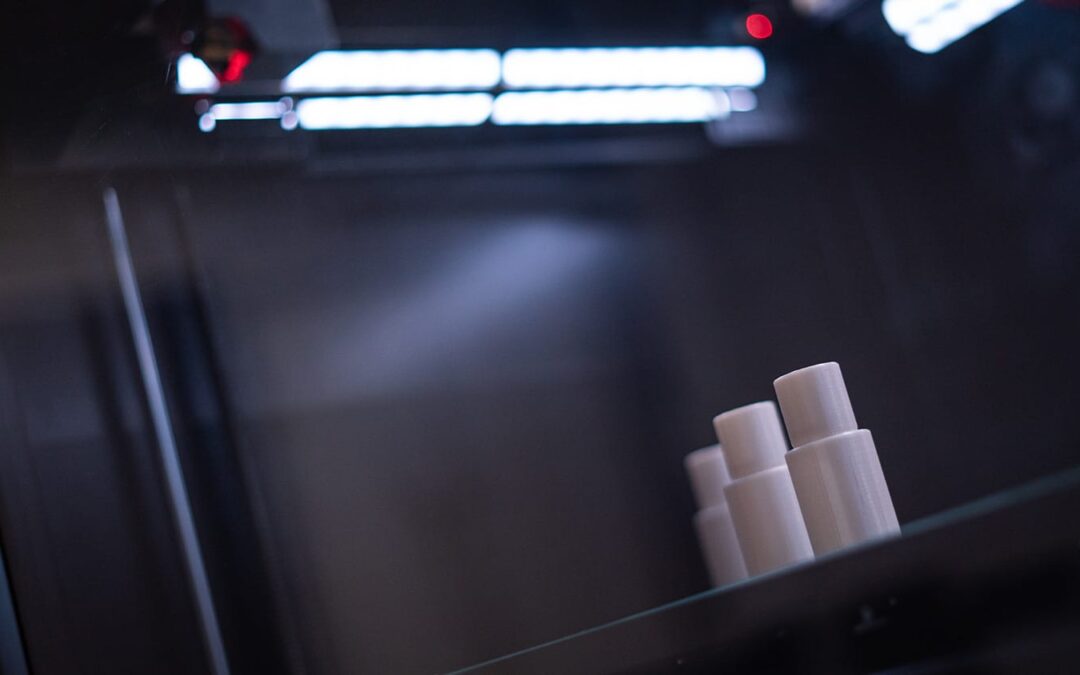
The versatility of Thermoplastic Polyurethane (TPU) transcends into a myriad of applications, where its rubber-like flexibility coupled with the precision of 3D printing brings forth innovative solutions. Below are some notable application examples of 3D printed TPU, demonstrating its potential in both consumer and industrial realms.

  • Footwear:
    • TPU is extensively used in the footwear industry to create flexible yet sturdy shoe soles. 3D printing with TPU allows for customized designs catering to different footwear needs, be it athletic shoes, orthopedic insoles, or fashion-forward footwear.
  • Sealing Rings:
    • The material’s inherent flexibility and durability make it a prime choice for manufacturing sealing rings. 3D printed TPU sealing rings can be tailored to fit specific dimensions and tolerances, ensuring a snug fit and effective sealing.
  • Protective Cases:
    • From smartphone cases to protective covers for electronics, 3D printed TPU offers a blend of shock absorption and aesthetic appeal. Its capacity to withstand daily wear and tear while maintaining a sleek appearance is highly valued.
  • Medical Devices:
    • In the medical field, TPU is utilized for creating flexible components like tubing, cushioning, and various wearable devices. Its biocompatible variants can be employed in direct contact with the body, making it a viable material for medical applications.
  • Automotive Components:
    • TPU’s resistance to abrasion and flexibility finds applications in the automotive industry for parts like bushings, couplings, and flexible hoses. 3D printing enables rapid prototyping and customization of these components to suit specific vehicle models.
  • Gaskets and Connectors:
    • The capability of TPU to form airtight seals and withstand mechanical stress makes it a preferred material for gaskets and connectors. 3D printing these parts with TPU can ensure precise dimensions and enhanced performance.
  • Sporting Goods:
    • Items like custom grips, flexible guards, and performance-enhancing athletic gear can be 3D printed with TPU to cater to the individual needs of athletes, enhancing comfort and functionality.
  • Customized Promotional Products:
    • The ease of customization with 3D printing allows for the creation of personalized promotional products. TPU can be used to craft unique, branded items that are both functional and visually appealing.

These applications underscore the utility of TPU in the realm of 3D printing, fostering innovation across a broad spectrum of industries. The ability to tailor the material properties and geometries through 3D printing amplifies the advantages of TPU, making it a prized material for tackling complex design challenges.

What should I take into account when printing with TPU?

Printing with TPU is difficult. Therefore it is necessary to practice first with PLA before printing with TPU. TPU needs more time to melt and flow. If you print too fast, the material will collapse. Therefore it’s important to reduce the printing speed. Also, the kind of printer you use is relevant for printing TPU. In case the drive motor is located on the back of the printer, the material is pushed through the entire extruder to eventually melt in the print head. When using printers with a direct drive, where the motor is located in the print head, the filament doesn’t need to be pushed through the entire extruder. It only has to bridge a small distance, until it is melted. Imagine you push an elastic through a tube, the elastic will accumulate: the greater the distance, the more difficult it becomes. If the drive motor is located in the print head, the filament has to bridge a smaller distance. Thus, you need a printer with a direct drive to print well with TPU filament.

How to influence the flexibility?

Several TPE’s are available: ones that are really rigid and others really elastic. However, the elasticity of the final product is not only affected by the used filament. The printing technique also has influence on the elasticity. The thinner you print, the more elastic your product becomes. For example: printing a honeycomb structure creates thin layers with air between them. In this way you can determine which part is more flexible than the other. Thanks to the printing technique you can reach different levels of flexibility. When rubber is vulicanized, the end product is always solid. Thus it isn’t possible to play with the elasticity of rubber.

Alternative Materials for Flexible 3D Printing

While Thermoplastic Polyurethane (TPU) stands as a popular choice for flexible 3D printing, there are other materials in the market that also offer flexibility alongside other distinct properties. Exploring these alternatives can provide a broader perspective and more options when embarking on projects requiring flexible components. Here are some of the alternative materials for flexible 3D printing:

  • Thermoplastic Copolyester (TPC):
    TPCs are known for their elasticity and chemical resistance. They offer a good balance between flexibility and mechanical strength, making them suitable for applications like industrial tubing and flexible connectors.
  • Flexible PLA (PolyLactic Acid):
    Flexible PLA is a softer variant of the standard PLA material. It offers a level of flexibility while maintaining the ease of printing that PLA is known for, making it a good starting point for those new to flexible 3D printing.
  • Polyether Block Amide (PEBA):
    PEBA is recognized for its high elasticity and strength, resembling rubber-like properties. It’s suitable for applications where excellent mechanical properties and flexibility are required.
  • FilaFlex:
    FilaFlex is a proprietary blend that boasts extreme flexibility, making it one of the most flexible 3D printing materials available. It’s ideal for applications where high flexibility is the priority.
  • Elastollan (TPU-based):
    Elastollan is a type of TPU material but with variations in its formulation to cater to different application needs. It’s available in different grades to match varying levels of hardness and flexibility.
  • FlexSolid:
    FlexSolid is known for its ease of printing and moderate flexibility. It’s a suitable choice for those looking to venture into flexible 3D printing without dealing with the challenges posed by ultra-flexible materials.
  • Rubber-like Resins (for SLA/DLP printing):
    For those utilizing SLA or DLP 3D printing technologies, rubber-like resins are available that simulate the properties of rubber. These resins can achieve fine detail along with flexibility, making them a choice for precise, flexible parts.

Each of these materials brings a unique set of properties and advantages to the table. The choice between them would depend on the specific requirements of the project at hand, such as the degree of flexibility, chemical resistance, ease of printing, and the 3D printing technology being used. By understanding the characteristics of these alternative materials, individuals and organizations can make informed decisions to meet their flexible 3D printing needs best.

Can I combine support material with TPU?

When using support material, you should pay attention to the print and bed temperature. These have to be about the same as the temperature of the used filament. PVA requires approximately the same temperature as TPU and therefore PVA is the best option to combine with this filament. Besides support material, is it possible to combine TPU with another material? Yes, but in this case both should also have the same print and bed temperature. ABS requires a higher temperature than TPU. Therefore this wouldn’t be a good combination, because the TPU filament will melt on the print bed. Also, when printing with two materials, we advise to let the parts fit mechanically together. In this way the parts remain attached to each other, even if the print adhesion doesn’t stick together. More about printing with support material you will read here

Would you like to print flexible 3D models?

Our dddrop EVO Twin 3D printer features a direct drive, so it’s suitable for printing TPU. Furthermore, for optimum print quality, we offer our own dddrop TPU filament. In case you have any questions, please feel free to contact us: info@dddrop.com.  We would love to help you.

FAQ

Can you 3D print silicone rubber?

Yes, it is possible to 3D print silicone rubber using specialized 3D printing technology. There are certain types of 3D printers that are designed to handle silicone material, and they extrude liquid silicone rubber (LSR) which is then cured with heat or UV light to solidify. The process allows for the creation of flexible, durable, and heat-resistant silicone parts.

Can you 3D print soft plastic?

Yes, you can 3D print soft plastic materials. Thermoplastic elastomers (TPE) and thermoplastic polyurethane (TPU) are examples of soft plastic materials that are commonly used for 3D printing. They can be extruded through a 3D printer to create flexible and soft plastic parts. The degree of softness can be controlled by adjusting the printing settings and the specific type of soft plastic material used.

Can you 3D print rubber-like material?

Yes, you can 3D print rubber-like materials. As mentioned earlier, materials like TPU and TPE can mimic the properties of rubber to a certain extent. Additionally, there are specific rubber-like resins available for SLA or DLP 3D printing technologies that can produce parts with rubber-like flexibility and feel.