GIWO Engineering has chosen the dddrop 3D printer for prototyping

GIWO Engineering has chosen the dddrop 3D printer for prototyping

Technical drawing agency Giwo Engineering uses the dddrop 3D printer, on their website they explain why:

Much is possible with 3D-printing and it’s being used in various sectors, like engineering, manufacturing, automotive and education. The technology has many advantages over conventional fabrication. This way you can make prototypes and end products simple and fast. There are no obstacles during the engineering process because you can create products in any desired form. Besides, you can realize prototypes and end products at low cost through the FDM technology. FDM is a technique based on extrusion. By using a print head, a melted layer of plastic is deposited on the print bed, which then adheres. Once the first layer has been drawn, the print bed lowers and a new layer is built on the previous layer. This process repeats for a certain time, which ultimately results in a 3D model.

Giwo Engineering has chosen the dddrop printer with FDM technology, because it better fits our target audience. All functions the dddrop 3D printers have, are based on customer suggestions. The result is therefore a user-friendly printer for professional use. For example, the dddrop Leader TWIN is a printer with a large build volume: 330x310x305mm. It contains two independent print heads, each with its own control. In this way 3D models can be realized with two different colors or materials. The extra print head can be used for support material such as HIPS or PVA.

Would you know how your company can uses the dddrop 3D printer in  your prototyping proces? Please contact us, our 3D specialist will explain everything you want to know.

What to do with overheating filament?

What to do with overheating filament?

A stable printing process

The right temperature remains the code word when making good 3D prints. After all, it remains a plastic process, where temperature is an essential component. With a higher ambient temperature, a number of things will be important to keep the printing process stable. What components these are and what you can do about them you can read here.


It’s all about temperature 

The basic principle of 3D printing is that a plastic (filament) is heated to liquefy, so that the filament can be passed through the print head. The point of temperature at which the filament begins to melt is called the glass temperature. This temperature varies from filament to filament. You can imagine that the glass temperature must therefore be reached in order to lay down good print layers. The most ideal situation is when the filament is laid down and cools immediately so that it becomes solid and cannot deform. The next layer can then be printed immediately. Finding the right balance between temperature and cooling so that the filament can flow freely through the nozzle, but also solidify in time to maintain the exact dimensions of your 3D printed part, is the trick. Unfortunately, this is easier said than done. Occasionally, we have to deal with overheating. This is when the temperature of the filament stays too hot for too long, resulting in it melting away and distorting your print model. We cover the most common causes of overheating, as well as the solutions here.

Not enough cooling

A common cause of overheating is that the filament is not cooled fast enough when it is poured. The filament coming out of the extruder head can be as high as 250°C, depending on the filament being printed. For many types of filament, it is good to cool the layers immediately after depositing, this prevents deformation of the layers. The dddrop printers are equipped with multiple fans on the extruder head and in the back of the extruder head, so they can cool the product directly.  Two fans in the back of the cabinet are designed to control the temperature during the cabinet printing process. Watch out for too much cooling. There are plastics such as ABS, PA-12 & PC that cannot withstand temperature fluctuations. It causes shrinkage and makes the plastic warp.

To high extruder temperature

If fan cooling is not working (enough) you can try lowering the temperature of the extruder head to print at a lower temperature. Start with a reduction of up to 10 degrees Celsius. Note: do not lower the temperature too much, you then run the risk that the filament does not run through the extruder head because it is not liquid enough. At that point you will have to deal with a clogged nozzle.

To be (too) fast

If the layers are printed in too quick succession, there may not be enough time in between to allow the previous layer to cool sufficiently. This usually occurs when printing very small models, as the layers here are deposited in a few seconds. Again, even with a cooling fan, the layers may not be cooled down fast enough. You can choose to adjust the print speed manually in Simplify3D. You can set the software to adjust the print speed for layers that take less than 15 seconds to print. The print speed for these small layers is then automatically slowed down.

Tip: Perhaps not the most obvious option, but when printing small models you may choose to have multiple models on the board at once. The RAPID ONE has a large volume, which creates a lot of print space on the print bed. By printing multiple models at once, you create more time between depositing the different layers. The extruder head goes to the other models first before the next layer is deposited. This can give just enough time for the layers to cool sufficiently.

The advantage of the dddrop is that all filaments come with ready-made FFF profiles. These are settings that come with the filament. All cooling values are focused on the filament and calculated at room temperature. If the ambient temperature does increase, you can adjust these values at any time with, if necessary, support from our dddrop helpdesk.

Bicycle Manufacturer Batavus Gratefully Uses the dddrop 3D Printer

Bicycle Manufacturer Batavus Gratefully Uses the dddrop 3D Printer

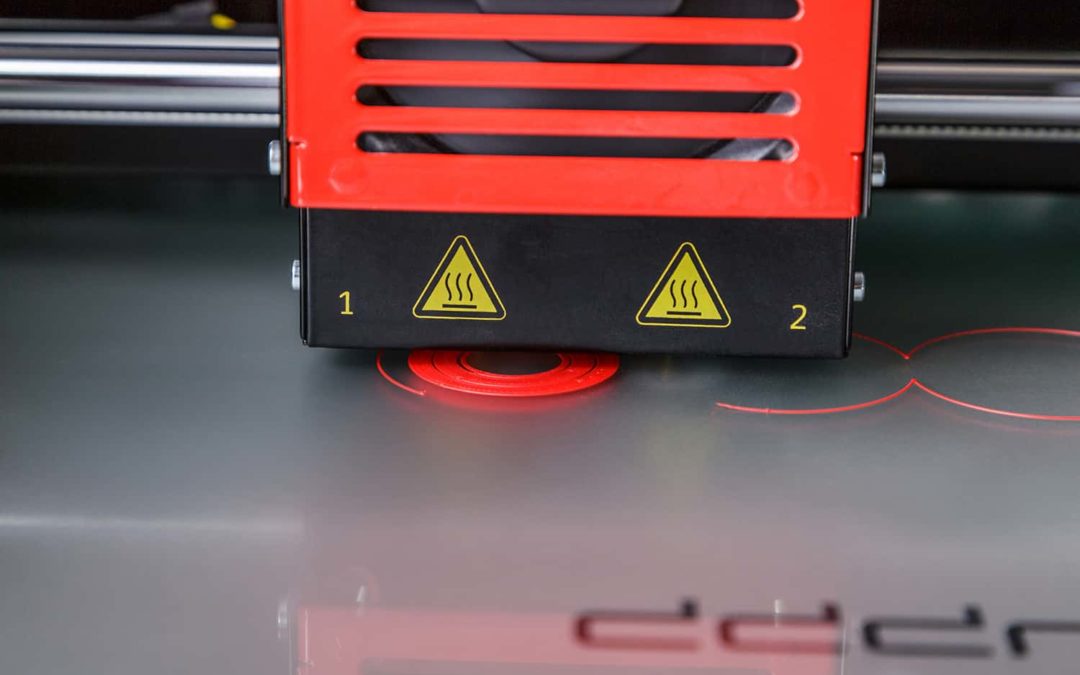
The dddrop 3D printer shortens development time
On a physical model you can see much faster where the design problems are

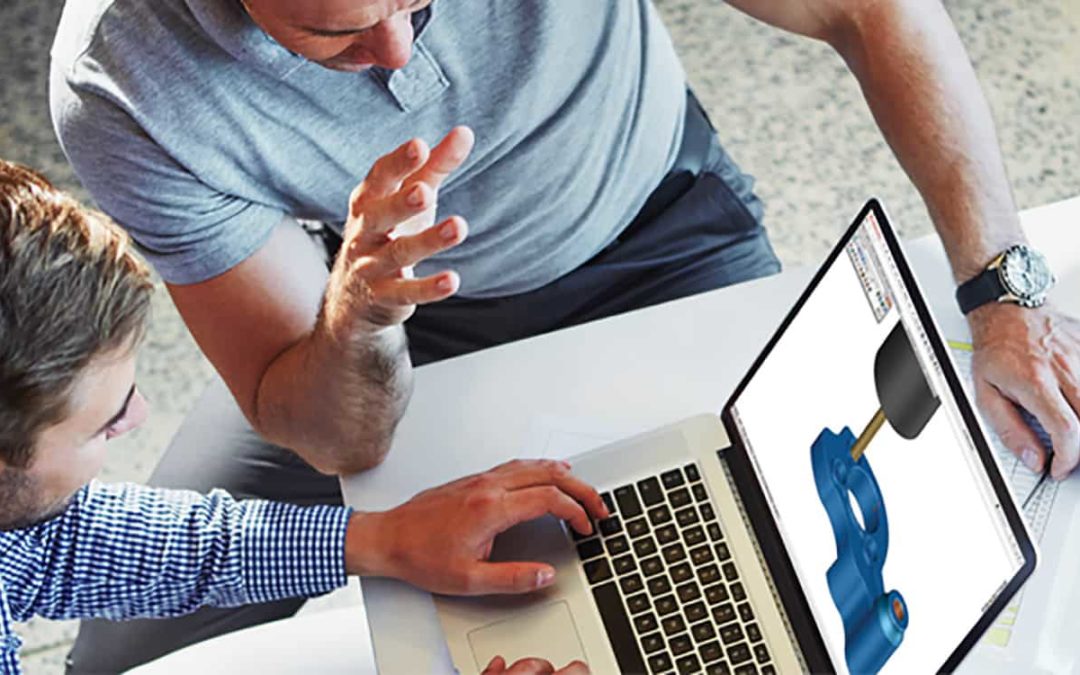
Digital design- and visualization software and even VR glasses can not match a physical model for Gerhard Korendijk,  mechanical engineer at Batavus. “Especially if you want to discuss a concept in a broader group.” Since his department has its own 3D printer, he regularly sends a file to the dddrop 3D printer at the end of the working day to have a tangible prototype in his hands the next morning. Accell Nederland is the bicycle manufacturer of Batavus, Sparta, Koga and Loekie. Accell Nederland is part of Accell Group, a globally operating company. Batavus stands for the solid family bike; Sparta stand for innovative electric commuting bicycles. Accell Nederland has its own development department at the factory in Heerenveen where, among other things the Batavus and Sparta bicycles are produced.

In the bicycle industry, the differences are small but important for the target group”, says Gerhard Korendijk, together with a colleague responsible for the engineering of brand-specific bicycle components such as frames, carriers and plastic parts. “If the designer has finished his sketch designs, usually in a 3D file and sometimes 2D sketches, we work it out technically. Ensure that the designs can be made, that the taxes are calculated, etc.” Prototypes play an essential role in this.

Prototypes
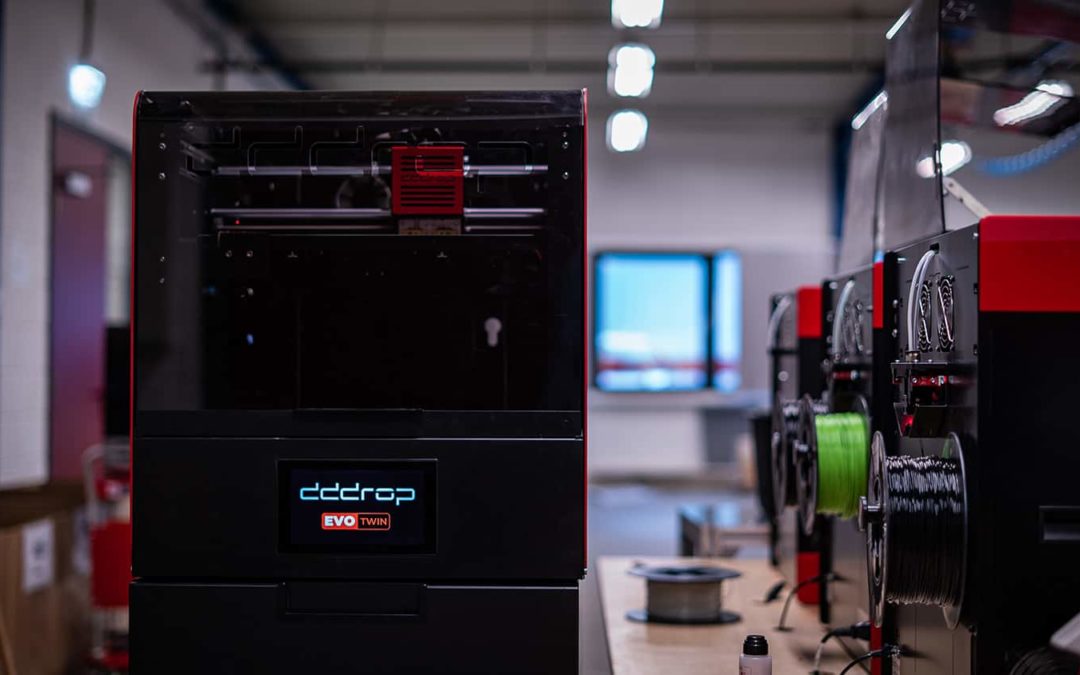
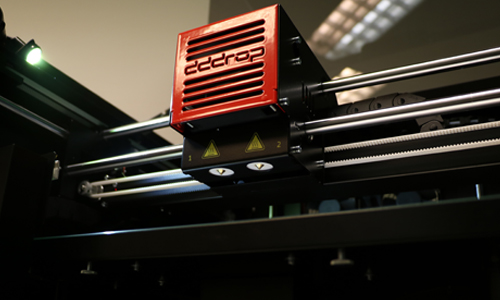
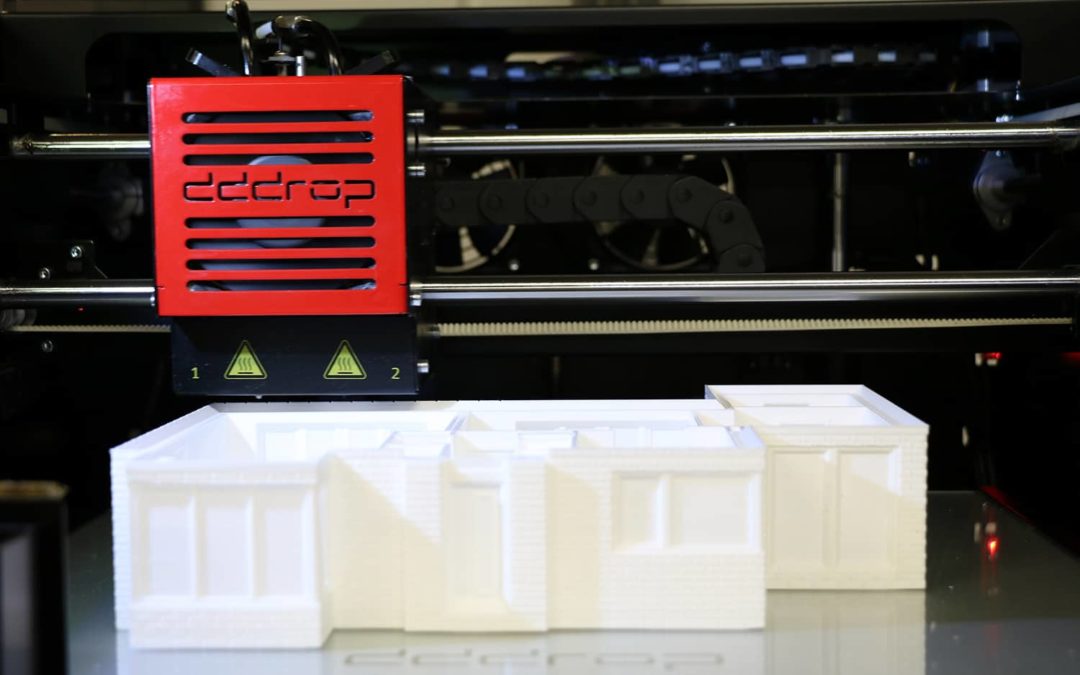
Gerhard and his colleagues have been printing these prototypes for two years now with the dddrop Leader 3D printer, an industrial FDM printer from Dutch soil. This saves a lot of time in the development process, he notes. “If you have a model in your hands, you can see the problems much faster than in a 3D model on the screen. With 3D design software you will continue to tinker with the design much longer”.  Gerhard Korendijk picks up some examples that have been printed on the dddrop 3D printer. In one model, the cable and plug of the battery are routed through the top tube to the center motor. “You then have to know whether the plug can easily be inserted during the assembly. I printed the part and discussed it with the colleagues from the production the day after”. In the past, he probably would not have done this because of the costs of an externally made prototype. “Such a process also takes just a few days; now we have the protype in our hands within a few hours.

Before the mold is made
Another example: the new easy lock adapter. The steering lock is made by a supplier. To make it easier to use, Gerhard and his colleagues had come up with a plastic ring with a lever to place the steering lock, so that you open and close the lock with more force. That is the easy lock adapter. “However, the supplier’s 3D model was not quite right. Before we had a mold made, we printed several prototypes in different sizes. Such a component costs no more than a euro.” In the end, they had an SLS model printed externally for a definitive functional test, but they were certain of the right size. The R&D department of Batavus prints parts every week, sometimes purely as a vision model, sometimes to actually test how a component in the assembly works out. Gerhard Korendijk even notices that he prints 3D products whose design is not complete. “Although we live in the digital age, I often print a part at night because I have something in my hands the next morning. That works better”.

Support was the deciding factor
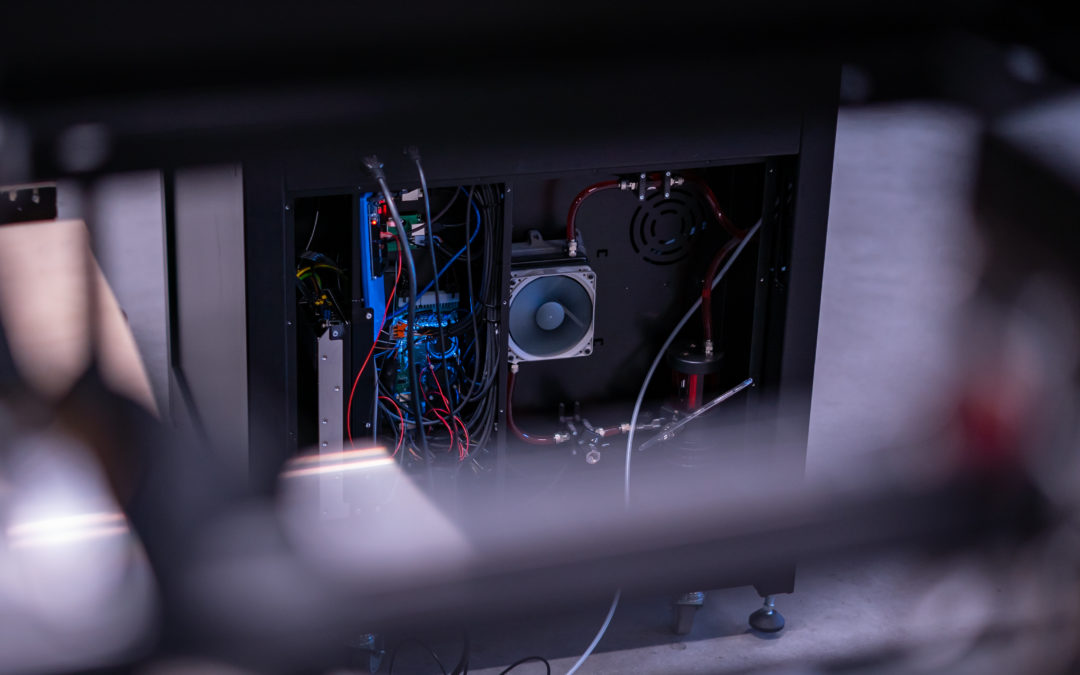
Batavus was one of the first to buy the industrial FDM printer from dddrop two years ago. At the bicycle manufacturer they mainly print ABS, sometimes PLA. The drawing work is done in SolidWorks, for slicing one has switched to Simplify 3D after a while, which has standard profiles for the dddrop printer and where easily profiles can be created. The way in which 3D simplify 3D divides the product and provides the support, delivers better prints that require less support and therefore cost less material. “I would like 3D printing to be as easy as document printing, but we are not that far yet”, says Gerhard Korendijk. “It’s not plug and play yet, maybe in 10 years. ” However he does notice that tweaking is becoming less and less necessary. With the material profiles for the dddrop printer in simplify 3D you have come a long way. And otherwise there is always the helpdesk. The support that dddrop offers at the time was the reason for Batavus to choose this manufacturer. “The 3D printer comes from the same supplier as our CAD software. We knew that the helpdesk was good. That also applies to dddrop. When you call the helpdesk, you notice that they know the printer in depth.” What he mainly noticed is that the team of  dddrop does something with the comments from the p ractice. Feedback from users such as Batavus is important input for the continuous improvement of the 3D printer.

Earned back quickly
For the R&D team at the bicycle manufacturer in Heerenveen, the 3D  printer is indispensable. “We can develop faster with fewer errors. By printing our prototypes, we certainly could have pretended a few times that we would have to adjust molds afterwards”, says Gerhard Korendijk. In that respect, the investment has already been recouped twice.

This article was publiced at 3dprintmagazine.eu, read the whole magazine here.

Benefits of printing with a closed chamber

Benefits of printing with a closed chamber

Benefits of printing with a closed chamber

Purchasing a 3D printer may result in some stress in choice because there is a lot to choose from. An important difference is the construction of the 3D printer. There are 3D printers on the market without a casing/cabinet, these printers are very sensitive to the ambient temperature. There are also 3D printers on the market with a closed casing/cabinet, so the temperature is considerably better to regulate. These closed chamber 3D printers are generally more expensive, but also offer more possibilities with better print performance.

Print temperature
To be able to make a deliberate choice on which 3D printer the most suitable is for you, it is useful to find out more about the 3D printing process first. When making a 3D print, the temperature is of great importance. Without the right temperature it is impossible to make a good 3D print. The print material (filament) must melt to be able to go through the print head (nozzle) and to lay it down per layer. The temperature at which the filament changes from solid to liquid phase is called the glass transition temperature. This temperature differs per filament. The higher the temperature must be, the more difficult to realize this with an open printer. The filament will still be able to be sent through the hot print head. However when it is deposited on the print bed and it cools down too quickly, due to the ambient temperature, it is very likely that the filament will warp on the print (glass) plate or there will be delamination higher in the product.

Open 3D printers
The more simplified 3D printers are in general the open printers. These are available from around €250,-. Very accessible and great for simple prints where the material (filament) is less important. These 3D printers can only print the filaments PLA and PET-G. PLA and PET-G are totally not shrink-sensitive and can therefore be printed with an open printer.

PLA is strong and hard plastic material that cannot simply be pulled out of its context: it can withstand great forces. But in case of a hard blow or a fall, it is just glass and it will break. PLA is is therefore especially suitable for vision models and not for industrial use. Great for home, harden and kitchen experiments.

PET-G is a very strong material that is also flexible: it can be stretched twice its own length before it breaks. Thanks to the combination of strength, toughness and flexibility, it is extremely suitable for parts that move a lot and where fatigue lurks.

Heated printbed
The dddrop 3D printers are equipped with a heated printbed up to 130 ºC. This is the heating source of the printer, the hot air rises and the warm air remains in the printer due to the closed box. The big advantage of this is that the warping on the print bed is often prevented.

Closed 3D printers
When we talk about filaments such as ABS, PA (polyamide, nylon) PC (polycarbonate), carbon, metal-filled filaments or so on, the temperature really matters. These filaments have a high glass temperature. To be able to print these materials shrink-free, you really need a conditioned chamber. It is important that a kind of oven is created. Often we want a chamber that is as warm as possible, but when the chamber is too warm, the printer head gets stuck. That is why it will have to be cooled without losing too much temperature in the chamber. Is there a door open and there arises draft? That is not a problem. It does not affect your print. The ambient temperature is a lot less important. Although a room temperature is required for the standard print setting for the best results.

The dddrop printers have a closed, conditioned chamber which makes it easy to regulate the temperature. This makes it possible to print with various (high-tech) filaments.


What is 3D print delamination and how do you prevent it?

What is 3D print delamination and how do you prevent it?

What is 3D print delamination?

We talk about delamination in 3D printing when a shrinkage occurs higher up in the print model, during 3D printing. When and how fast a product shrinks depends very much on the type of material you use during printing. PLA and PET-G are not sensitive to this, but when you use more complex, shrink-sensitive materials like ABS or FLEX, there is a greater risk of shrinkage and warping. For example, when the material cools down too much during the printing process.

Difference between warping and delamination of a 3d print

Warping can occur in two places in the model. Firstly, at the bottom of the product, i.e. directly on the print bed. This is called warping and it occurs frequently. Various methods have been developed to prevent this. Second, delamination; two layers in the model pull away from each other and a crack appears. This is mainly due to adhesion errors. When the right settings are used for the right material, delamination should not occur.

Room Control

When printing with highly shrink-sensitive materials, printing under the right temperatures and space control is very important. Of course, a closed environment is essential for this. This keeps the temperature in the printer cabinet stable. But with room control, with which the dddrop RAPID ONE is equipped, it is continuously checked whether the cabinet temperature is stable or whether it needs to be adjusted. Only if it is really necessary is air supplied from outside. The RAPID ONE thus has a conditioned space.

Blockage of the nozzle

Another cause of delamination can be that the nozzle becomes clogged because the correct settings are not being pressed. This may be because too much material is being squeezed through the nozzle too quickly, while the temperature is set too low. This results in an extrusion that is too low. The result is that the layers are not built up properly: too little material is applied, so the adhesion is not optimal. In this way, the chance of cracking the model increases.

Delamination is an adhesion problem that we only see with very shrink-sensitive materials where the print settings are not properly adjusted. With its chamber control, the RAPID ONE is the ideal printer for printing shrink-sensitive materials.

Closed versus Open 3D printer systems

Closed versus Open 3D printer systems

Closed versus Open systems

Where the purchase of a professional 3D printer the first years was only reserved for the major players in the market, 3D printing is becoming more and more accessible. Also a professional 3D printer is becoming more affordable, there are machines from €4.000,- that deliver good quality models. Printing a prototype yourself is closer than you might think.

Imagine that you don’t have to wait six weeks for a model that you already know is just not good enough.  Instead, in the evening, before you go home, you turn on the 3D printer yourself and the next morning the prototype awaits for you.

Which 3D printer is the most suitable?

The question you have to ask is: which 3D printer is the most appropriate and are the possibilities indeed endless? It is wise to clearly map out what is expected of the 3D printer, or perhaps even more important, in the near future. It is important to know that we make a distinction between two types of 3D printers: 3D printers with a closed system and 3D printers with an open system.

Closed system

The 3D printers with an closed system are well developed and highly reliable 3D printers. These printers are controlled by one specific software system and they are designed in such a way that they can process one predetermined material. Everything in and on this machine is geared to the material of a particular supplier. Think of the right temperature for processing the material, how the material is delivered, but also the operating system from the software package. No flexibility but a continuous quality of the end product.

Open system

Recently there are professional 3D printers with an open system on the market. These printers can be controlled by different software programs and perhaps, even more important, they can process all materials from all providers. It is not a problem when there is more produced or when the material can be purchased cheaper through another provider.

Is the prototype not to your liking? Switch to different material. The possibilities are almost endless with an open system. On the other hand, there is more knowledge and expertise expected from the 3D engineers or good support from an external party.

The purchase of a professional 3D printer is within reach, but a well-considered choice is important, even in the term to get the best 3D printer. The dddrop RAPID ONE has the open system, which gives you a lot of freedom in choice.

What to do with overheating filament?

Keep your 3D printer head cool!

All about the temperature

That the right temperature is very important in 3D printing needs no further explanation. The dddrop RAPID ONE is equipped with a closed chamber, to limit the influence of the environment. But you can imagine that if the temperature rises, it may be necessary to produce less heat or even to cool it, to get the same result. Especially if your printer is in a room without air conditioning, this is something to watch out for. Here are some tips to minimize the influence of external temperatures.

Change print bed temperature

If your printer is in a warm room, it can be useful to lower the temperature of your print bed a bit after printing the first layers. An example: when printing ABS, we usually recommend a print bed temperature of 120 ºC. If the room temperature exceeds 25 ºC, it is advisable to change the bed temperature to 100 or 110 ºC.

Ventilate with fans

Make sure the fans on the back of the printer are always on when printing in high temperatures. To cool down some more, you can speed up the fan in the print head after the first layers have been printed and the print head has warmed up. Change the fans – for example – from 40% to 60%.

Not too hot, not too cold

When temperatures outside rise, we often want to cool the inside temperature. This could be a pitfall, because the room temperature might get too cold for the printer. The printer needs a warm surrounding to make sure that the models are printed stress free and smooth. The temperature cannot be too high either, because this makes the filament weak, causing it to get stuck in the wheel.  At dddrop we recommend a room temperature (between 21 ºC and 24 ºC) for the best print results with the standard print settings.

3D printing remote production

3D printing remote production

A new way of producing

There is no doubt that the 3D printer, with its endless possibilities, is increasingly changing the way we produce. The technology of 3D printing is in full development and partly because of this development, 3D printing is becoming more accessible and traditional production lines are becoming more efficient and fair. Remote printing certainly contributes to this. What do we mean by remote printing and what are the advantages?

Remote 3D printing

The addition of remote printing allows companies to remotely control a 3D printer from anywhere in the world. A good working network or WIFI connection gives you the ability to turn on a 3D printer in China while you are in the Netherlands or anywhere in the world. This addition brings a number of important benefits.Printing without sharing files

  • Less transportation costs
  • Environmentally friendly
  • Time savings

Printing without sharing files

The fact that an engineer does not want to share his self-developed 3D models is not strange. The monitoring of the files and the knowledge of the engineers is very important in the product development process. Especially in the prototyping process, the files are essential to come up with a new product and this data should not fall into the hands of others. When you print remotely, you can log on to a 3D printer and order your print from anywhere in the world without sharing the data with others.

Less transport costs

Remote printing significantly reduces the need to transport goods. After all, there is no need to send physical goods around the world. All you need to send is the print order via an internet connection. The final, physical, product is then printed on site. Especially when products are produced on the other side of the world, remote printing can be a great advantage in terms of transportation costs.

Environmentally friendly

By removing transportation from the production process, a lot of fuel is saved. In the traditional production process, a product is often transported several times. After development, the product is often made by a manufacturing company in another country, then in some cases it is transported to a local packaging company and then it goes to the stores or to the manufacturer. Since the product is transported several times, many exhaust gases are emitted. Using remote printing, it is possible to produce the entire product locally, including the packaging.

Time savings

In addition to the savings in transportation costs and the environmental benefits, there is also a benefit in time savings. Global shipping takes a lot of time, even though we are spoiled with global delivery times of three days. Remote printing is much faster. The print order is given, the printer goes to work on site and a few hours later you actually have your product in your hands.

The dddrop RAPID ONE has a SMART-module which enables printing through WiFi, a Lan or a network connection. Through the useful app -that can be installed on your smartphone- and the camera in the printer, you can monitor and operate the printer at all times.

How to prevent stringing while 3D printing

How to prevent stringing while 3D printing

What causes stringing in 3d printing?

When the head of your 3D printer has to move from one point in your model to another, the filament can flow out. The result is stringing: small strands of material appear between the printed parts. Stringing is especially common in models that have large open areas, but there are ways to prevent it.

The right material

Whether stringing occurs varies by material. ABS, for example, hardly causes string formation, but PET-G does. Material composition also has an impact, so the degree of strings can vary by brand of filament.

Retraction setting

It is possible to activate the retraction setting in the slicer software. This functionality ensures that the filament is retracted into the nozzle before the print head moves to another part of the product. The retraction speed is also important, if it is set too low, strands may still appear.

Wipe nozzle setting

This option can be combined with the retraction setting. With sweep nozzle, the printer will sweep the last bit of liquid material on the model before retracting the filament and moving the print head to the next location. In this way, wires are minimized even further.

Temperature

If the filament is still oozing after retraction, the print temperature may have been set too high. The material then becomes very fluid, making retraction more difficult to perform. Check the settings with your filament supplier and adjust the temperature if necessary.

Movement speed

The greater the distance between two points in the model, the harder it is to keep the filament in the nozzle. Therefore, for a model with large gaps, we recommend slightly increasing the movement speed. The movement speed is not the same as the print speed, because it is the movement between print points. Note that the speed should not be set too high either, as this could cause the pinhead to overshoot, causing shifts in the model. So find the right balance.

Is the product still not perfect? Your last option is the finishing: you can clear the model of the last strings with a heat burner or a hairdryer.

Creating a solid top layer for your 3D print

Creating a solid top layer for your 3D print

A 3D print usually consists of a solid exterior filled with a grid. This saves time and material, resulting in the same model. Of course, you want the exterior to be smooth and solid, but that can be a challenge for the top layer. How do you ensure a strong and sturdy covering for your product?


Prevent sagging

The solid top layer is printed on top of the aforementioned grid that fills the print. This means that the top layer must span the gaps in the filling. Logically, the material sometimes sags through those holes. To ensure that the material reaches the other side properly, you can do the following:

Increase infill percentage

The infill is the foundation of your top layer. You can imagine it’s hard to create a proper top layer when the foundation exists mostly out of air. Try to increase the infill percentage to create a better bearing capacity for the top layer. Try to find the optimal ratio, so you don’t lose unnecessary material and time.

More layers

In addition to the filling, the number of compression layers can also be the reason why the top layer is not firm. The top layer consists of several solid layers that are bonded together. To get a smooth top layer, it must be thick enough. As a rule of thumb you can use a height of 0.75mm for the entire surface layer. Depending on the pressure height, you will therefore have to use several layers to achieve a top of 0.75mm. With the standard layer height of 0.25mm you would need at least 3 layers for a solid top.