Keep your 3D printer head cool!

Keep your 3D printer head cool!

All about the temperature

That the right temperature is very important in 3D printing needs no further explanation. The dddrop RAPID ONE is equipped with a closed chamber, to limit the influence of the environment. But you can imagine that if the temperature rises, it may be necessary to produce less heat or even to cool it, to get the same result. Especially if your printer is in a room without air conditioning, this is something to watch out for. Here are some tips to minimize the influence of external temperatures.

Change print bed temperature

If your printer is in a warm room, it can be useful to lower the temperature of your print bed a bit after printing the first layers. An example: when printing ABS, we usually recommend a print bed temperature of 120 ºC. If the room temperature exceeds 25 ºC, it is advisable to change the bed temperature to 100 or 110 ºC.

Ventilate with fans

Make sure the fans on the back of the printer are always on when printing in high temperatures. To cool down some more, you can speed up the fan in the print head after the first layers have been printed and the print head has warmed up. Change the fans – for example – from 40% to 60%.

Not too hot, not too cold

When temperatures outside rise, we often want to cool the inside temperature. This could be a pitfall, because the room temperature might get too cold for the printer. The printer needs a warm surrounding to make sure that the models are printed stress free and smooth. The temperature cannot be too high either, because this makes the filament weak, causing it to get stuck in the wheel.  At dddrop we recommend a room temperature (between 21 ºC and 24 ºC) for the best print results with the standard print settings.

3D printing remote production

3D printing remote production

A new way of producing

There is no doubt that the 3D printer, with its endless possibilities, is increasingly changing the way we produce. The technology of 3D printing is in full development and partly because of this development, 3D printing is becoming more accessible and traditional production lines are becoming more efficient and fair. Remote printing certainly contributes to this. What do we mean by remote printing and what are the advantages?
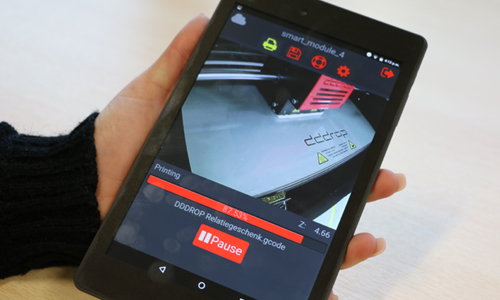
Remote 3D printing

The addition of remote printing allows companies to remotely control a 3D printer from anywhere in the world. A good working network or WIFI connection gives you the ability to turn on a 3D printer in China while you are in the Netherlands or anywhere in the world. This addition brings a number of important benefits.Printing without sharing files

  • Less transportation costs
  • Environmentally friendly
  • Time savings

Printing without sharing files

The fact that an engineer does not want to share his self-developed 3D models is not strange. The monitoring of the files and the knowledge of the engineers is very important in the product development process. Especially in the prototyping process, the files are essential to come up with a new product and this data should not fall into the hands of others. When you print remotely, you can log on to a 3D printer and order your print from anywhere in the world without sharing the data with others.

Less transport costs

Remote printing significantly reduces the need to transport goods. After all, there is no need to send physical goods around the world. All you need to send is the print order via an internet connection. The final, physical, product is then printed on site. Especially when products are produced on the other side of the world, remote printing can be a great advantage in terms of transportation costs.

Environmentally friendly

By removing transportation from the production process, a lot of fuel is saved. In the traditional production process, a product is often transported several times. After development, the product is often made by a manufacturing company in another country, then in some cases it is transported to a local packaging company and then it goes to the stores or to the manufacturer. Since the product is transported several times, many exhaust gases are emitted. Using remote printing, it is possible to produce the entire product locally, including the packaging.

Time savings

In addition to the savings in transportation costs and the environmental benefits, there is also a benefit in time savings. Global shipping takes a lot of time, even though we are spoiled with global delivery times of three days. Remote printing is much faster. The print order is given, the printer goes to work on site and a few hours later you actually have your product in your hands.

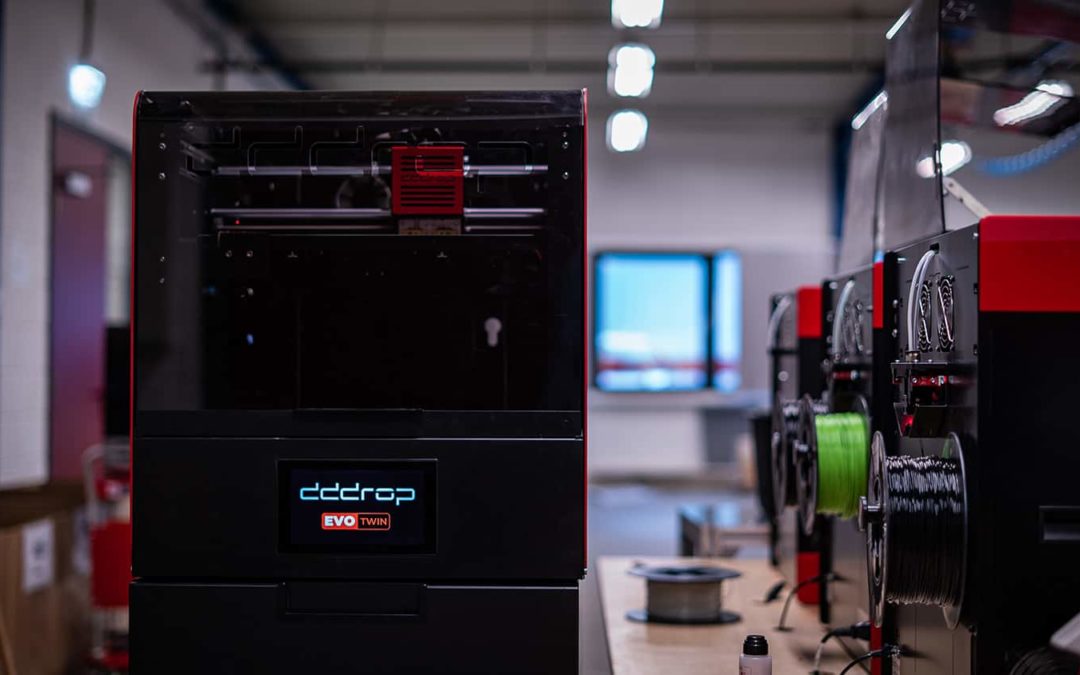
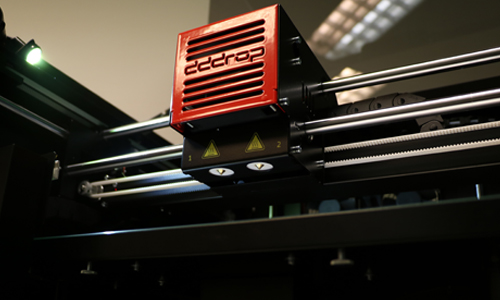
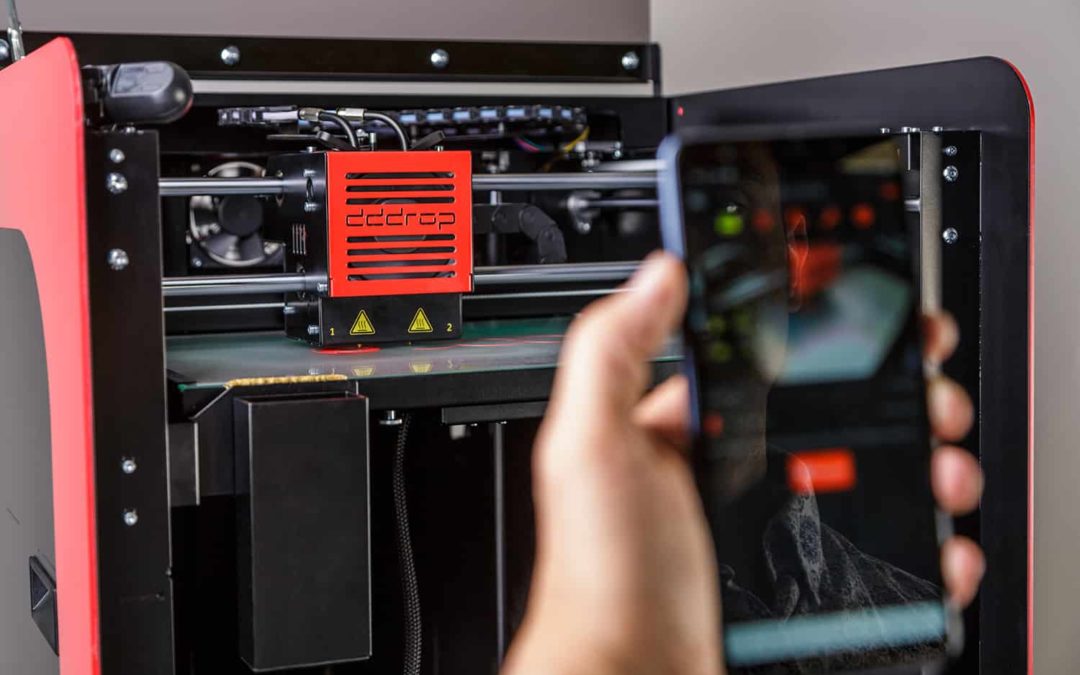
The dddrop RAPID ONE has a SMART-module which enables printing through WiFi, a Lan or a network connection. Through the useful app -that can be installed on your smartphone- and the camera in the printer, you can monitor and operate the printer at all times.

How to prevent stringing while 3D printing

How to prevent stringing while 3D printing

What causes stringing in 3d printing?

When the head of your 3D printer has to move from one point in your model to another, the filament can flow out. The result is stringing: small strands of material appear between the printed parts. Stringing is especially common in models that have large open areas, but there are ways to prevent it.

The right material

Whether stringing occurs varies by material. ABS, for example, hardly causes string formation, but PET-G does. Material composition also has an impact, so the degree of strings can vary by brand of filament.

Retraction setting

It is possible to activate the retraction setting in the slicer software. This functionality ensures that the filament is retracted into the nozzle before the print head moves to another part of the product. The retraction speed is also important, if it is set too low, strands may still appear.

Wipe nozzle setting

This option can be combined with the retraction setting. With sweep nozzle, the printer will sweep the last bit of liquid material on the model before retracting the filament and moving the print head to the next location. In this way, wires are minimized even further.

Temperature

If the filament is still oozing after retraction, the print temperature may have been set too high. The material then becomes very fluid, making retraction more difficult to perform. Check the settings with your filament supplier and adjust the temperature if necessary.

Movement speed

The greater the distance between two points in the model, the harder it is to keep the filament in the nozzle. Therefore, for a model with large gaps, we recommend slightly increasing the movement speed. The movement speed is not the same as the print speed, because it is the movement between print points. Note that the speed should not be set too high either, as this could cause the pinhead to overshoot, causing shifts in the model. So find the right balance.

Is the product still not perfect? Your last option is the finishing: you can clear the model of the last strings with a heat burner or a hairdryer.

Creating a solid top layer for your 3D print

Creating a solid top layer for your 3D print

A 3D print usually consists of a solid exterior filled with a grid. This saves time and material, resulting in the same model. Of course, you want the exterior to be smooth and solid, but that can be a challenge for the top layer. How do you ensure a strong and sturdy covering for your product?


Prevent sagging

The solid top layer is printed on top of the aforementioned grid that fills the print. This means that the top layer must span the gaps in the filling. Logically, the material sometimes sags through those holes. To ensure that the material reaches the other side properly, you can do the following:

Increase infill percentage

The infill is the foundation of your top layer. You can imagine it’s hard to create a proper top layer when the foundation exists mostly out of air. Try to increase the infill percentage to create a better bearing capacity for the top layer. Try to find the optimal ratio, so you don’t lose unnecessary material and time.

More layers

In addition to the filling, the number of compression layers can also be the reason why the top layer is not firm. The top layer consists of several solid layers that are bonded together. To get a smooth top layer, it must be thick enough. As a rule of thumb you can use a height of 0.75mm for the entire surface layer. Depending on the pressure height, you will therefore have to use several layers to achieve a top of 0.75mm. With the standard layer height of 0.25mm you would need at least 3 layers for a solid top.

Why 3D printing becomes more accessible

Why 3D printing becomes more accessible

Starting with 3D printing

Do you think 3D printing is a (too) big investment for your business? That might be a misconception. 3D printing is becoming more accessible, both in terms of purchase cost and the knowledge required to operate the printer itself. Technologies continue to evolve, and the 3D printer is obviously no exception. The 3D printer is also developing rapidly. There are several affordable, quality plug & play 3D printers on the market, accessible to a wide audience. 


Over 25 years ago, we didn’t even know what we could do with a 2D printer, and now we are already in the midst of 3D printer development. The companies or households that do not own a 2D printer, for printing text and images, are probably only a handful. Will the same be true for the 3D printer in 20 years? That’s hard to say, but the fact is that professional 3D printing will no longer be just for large companies by then.

3D printing techniques

When we talk about 3D printing, we distinguish three main techniques and therefore printer types. In all these techniques, the product is built up from individual layers. The computer ‘reads’ these layers from digital slices of the 3D CAD design. For making functional parts, SLS and FDM are the preferred methods. In addition, SLA printers are available to make products with a very smooth surface, high precision and functional mechanical properties. FDM is the most popular and accessible technique for making products.

The current 3D printer market

We can divide the current 3D printer market into three segments: the high, mid and low segments (the last being the hobby printer). The hobby printers are available in various webshops, with prices ranging from €250 to €3000. These printers generally do not have a closed housing and are therefore very sensitive to the environment. Nice for home use, but when the product is intended for prototyping or small series, it is advisable to switch to a printer from the middle or high segment.

The mid-range printers are priced between €4000 and €20,000. These printers are well-developed machines with many features, yet are easy to use. The included software automatically converts your 3D models to printable files. Especially the printers with a closed housing and an open filament system can be used for numerous applications. Finally, there are the high-end printers. This includes the printers with prices above €20,000, which is a large investment. It is therefore important to determine what the printer can do for your business and how much it will actually be used.

Is 3D printing worth the investment?

You may fantasize about owning a 3D printer, but the question remains whether it is worth the investment. A 3D printer is especially beneficial in three parts of the development and production process; in prototyping, in producing small batches, and in creating “new” shapes that are not feasible with traditional techniques.

3D print prototyping

More and more companies discover 3D printing as a useful tool for making prototypes. The biggest gain is time. You no longer lose weeks on making scale models or waiting for an externally produced product. With your own 3D printer you can start the print when you leave in the evening and the next day your scale model or product is finished.

Producing small series with a 3D printer

The current, traditional, production methods are mill-turn and injection molding techniques. For small batches, these techniques are very expensive. When you for instance only need 50 pieces of a certain part, it is much cheaper to print these yourself. Moreover, you have very little risk of stocks. You just turn on your printer and there the parts are.

Printing ‘new’ shapes

Traditional manufacturing techniques are limited in making certain shapes. Hollow products, for example, are fine to produce with a 3D printer. This means that your designers have fewer limitations in the development and production process.

Curious what a 3D printer can do for your company, without a too big investment? Have a look at our dddrop RAPID ONE or contact us for an informal consultation: info@dddrop.com.

Why don’t my 3D printing layers merge properly?

Why don’t my 3D printing layers merge properly?

What does under extrusion mean for 3D printing?

If all the layers of your 3D print are not printed correctly, it is likely due to under extrusion. Under extrusion is a complex problem that can lead to missing layers or layers that are not fully printed, leading to gaps in the model. Unfortunately, we cannot pinpoint a single culprit. Under-extrusion can have several causes, which makes it difficult to determine the actual problem. It usually has to do with using the correct extrusion width.


Unfeasible extrusion width

When we talk about extrusion width, we mean the width of the printing layer that the printer extrudes. How wide or narrow this layer can be depends on the nozzle size used. The printer software has default values for how wide a layer can be for a given nozzle size (100% is the minimum extrusion width for each nozzle and 120% is the maximum). If you enter a layer value that is too thin or if you use the wrong nozzle, the layer cannot be converted to a printing layer and therefore will not print. This results in missing layers in your model. Check which extrusion width is to be used and that you are using the correct nozzle for this width. If you cannot obtain the desired width with any nozzle, the model will need to be adjusted in the CAD software. You can also manually adjust the extrusion values in the printer software, but the options are limited because it must be technically feasible.

Clogged nozzle

 When under extrusion occurs, you would expect the solution to lie in pushing more filament through the nozzle and thus adjusting the pressure. This is possible, but only to a certain extend and with the right temperature. When the pressure is too high, the chance of a clogged nozzle is very big.  Which in turn causes under extrusion to occur again, because the filament isn’t printed correctly anymore.

Under extrusion is an adhesion issue, that could be caused by an unfeasible extrusion width. The dddrop printers have changeable nozzles, which allows for a big range of extrusion widths that can be printed. Furthermore, dddrop delivers the right basic settings for each material which helps to achieve the best result possible.