Creating a solid top layer for your 3D print

Creating a solid top layer for your 3D print

A 3D print usually consists of a solid exterior filled with a grid. This saves time and material, resulting in the same model. Of course, you want the exterior to be smooth and solid, but that can be a challenge for the top layer. How do you ensure a strong and sturdy covering for your product?


Prevent sagging

The solid top layer is printed on top of the aforementioned grid that fills the print. This means that the top layer must span the gaps in the filling. Logically, the material sometimes sags through those holes. To ensure that the material reaches the other side properly, you can do the following:

Increase infill percentage

The infill is the foundation of your top layer. You can imagine it’s hard to create a proper top layer when the foundation exists mostly out of air. Try to increase the infill percentage to create a better bearing capacity for the top layer. Try to find the optimal ratio, so you don’t lose unnecessary material and time.

More layers

In addition to the filling, the number of compression layers can also be the reason why the top layer is not firm. The top layer consists of several solid layers that are bonded together. To get a smooth top layer, it must be thick enough. As a rule of thumb you can use a height of 0.75mm for the entire surface layer. Depending on the pressure height, you will therefore have to use several layers to achieve a top of 0.75mm. With the standard layer height of 0.25mm you would need at least 3 layers for a solid top.

Why 3D printing becomes more accessible

Why 3D printing becomes more accessible

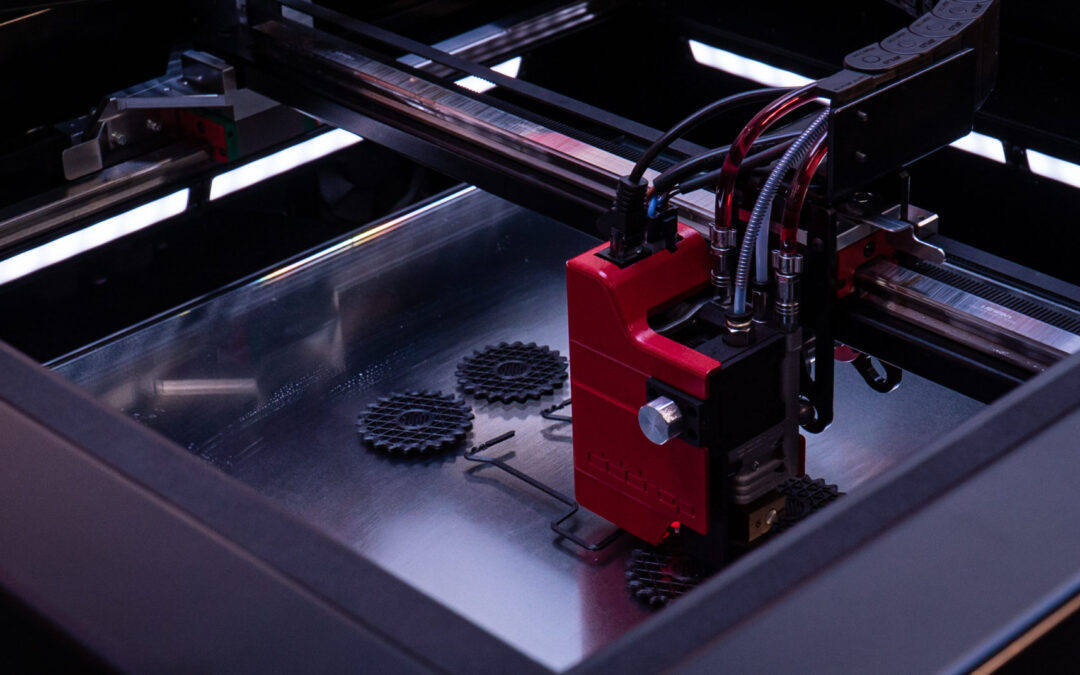
Starting with 3D printing

Do you think 3D printing is a (too) big investment for your business? That might be a misconception. 3D printing is becoming more accessible, both in terms of purchase cost and the knowledge required to operate the printer itself. Technologies continue to evolve, and the 3D printer is obviously no exception. The 3D printer is also developing rapidly. There are several affordable, quality plug & play 3D printers on the market, accessible to a wide audience. 


Over 25 years ago, we didn’t even know what we could do with a 2D printer, and now we are already in the midst of 3D printer development. The companies or households that do not own a 2D printer, for printing text and images, are probably only a handful. Will the same be true for the 3D printer in 20 years? That’s hard to say, but the fact is that professional 3D printing will no longer be just for large companies by then.

3D printing techniques

When we talk about 3D printing, we distinguish three main techniques and therefore printer types. In all these techniques, the product is built up from individual layers. The computer ‘reads’ these layers from digital slices of the 3D CAD design. For making functional parts, SLS and FDM are the preferred methods. In addition, SLA printers are available to make products with a very smooth surface, high precision and functional mechanical properties. FDM is the most popular and accessible technique for making products.

The current 3D printer market

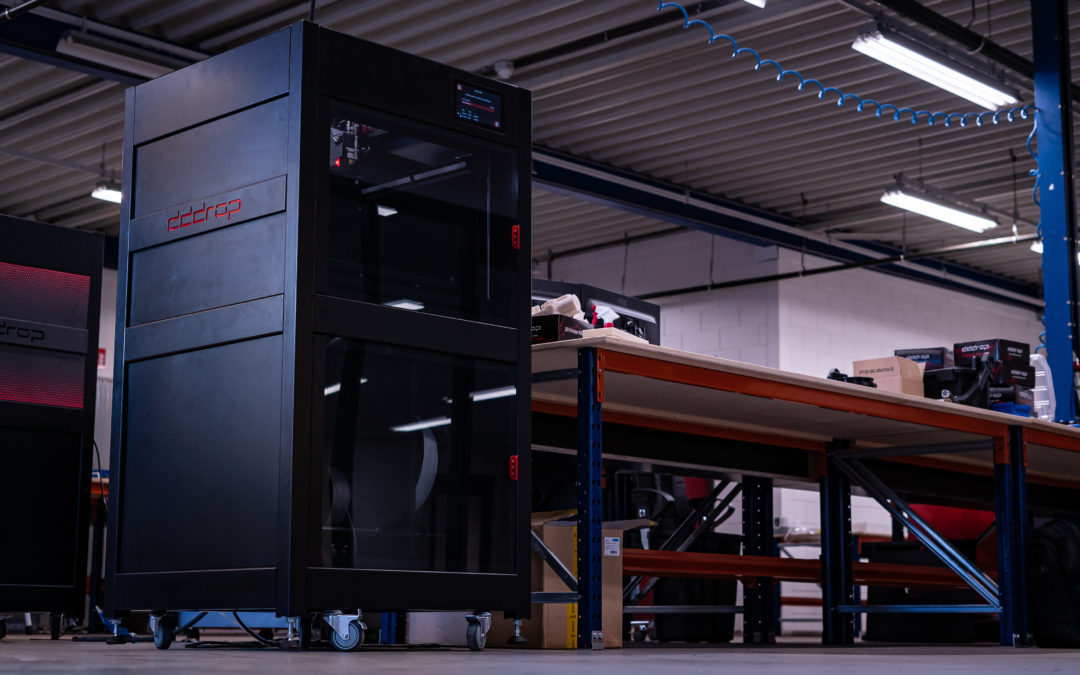
We can divide the current 3D printer market into three segments: the high, mid and low segments (the last being the hobby printer). The hobby printers are available in various webshops, with prices ranging from €250 to €3000. These printers generally do not have a closed housing and are therefore very sensitive to the environment. Nice for home use, but when the product is intended for prototyping or small series, it is advisable to switch to a printer from the middle or high segment.

The mid-range printers are priced between €4000 and €20,000. These printers are well-developed machines with many features, yet are easy to use. The included software automatically converts your 3D models to printable files. Especially the printers with a closed housing and an open filament system can be used for numerous applications. Finally, there are the high-end printers. This includes the printers with prices above €20,000, which is a large investment. It is therefore important to determine what the printer can do for your business and how much it will actually be used.

Is 3D printing worth the investment?

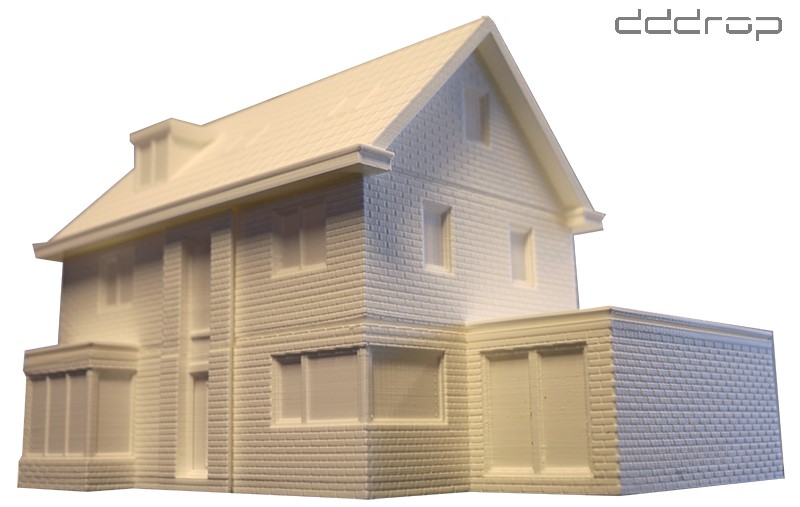
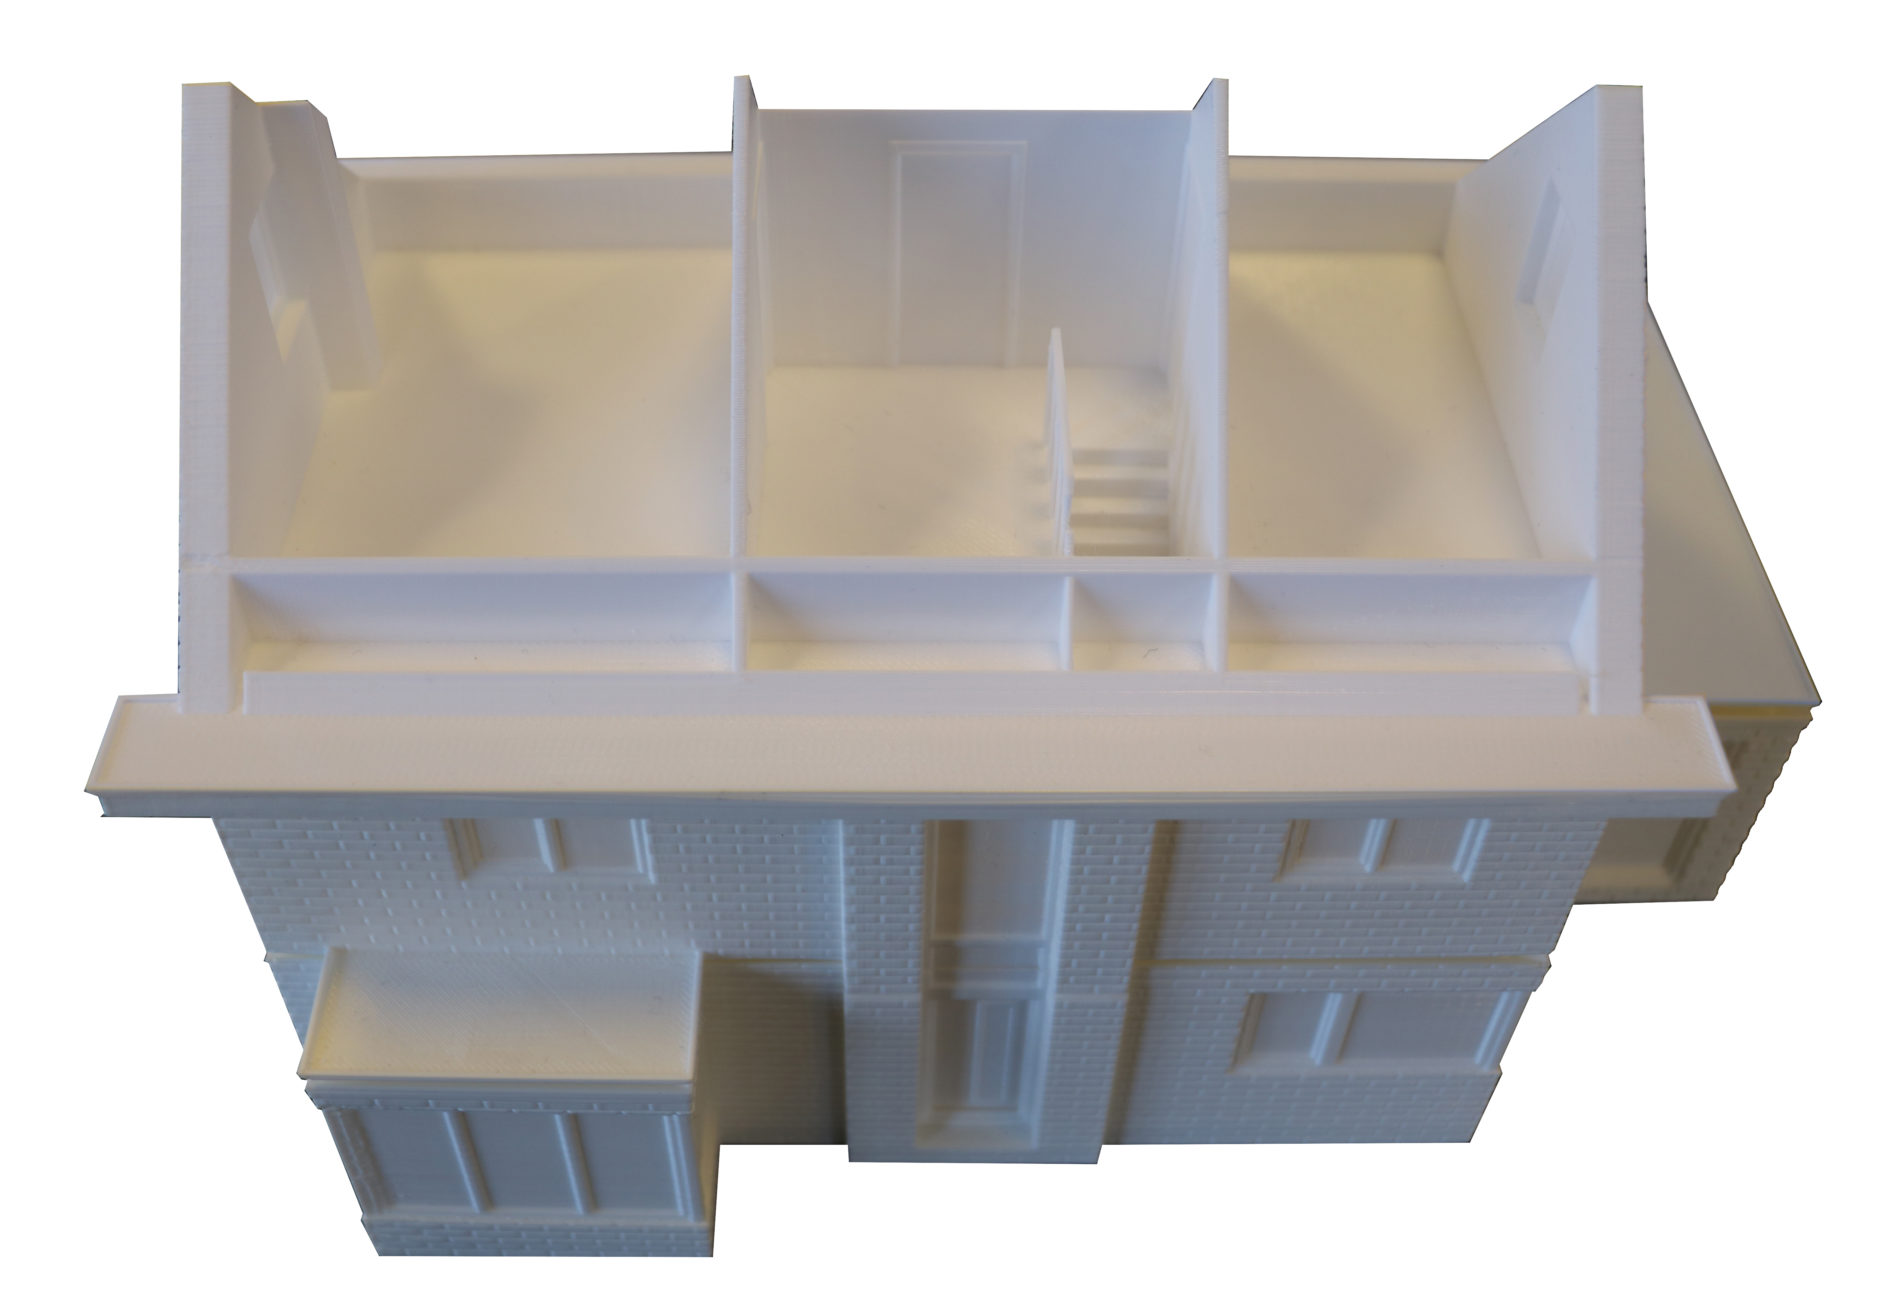
You may fantasize about owning a 3D printer, but the question remains whether it is worth the investment. A 3D printer is especially beneficial in three parts of the development and production process; in prototyping, in producing small batches, and in creating “new” shapes that are not feasible with traditional techniques.

3D print prototyping

More and more companies discover 3D printing as a useful tool for making prototypes. The biggest gain is time. You no longer lose weeks on making scale models or waiting for an externally produced product. With your own 3D printer you can start the print when you leave in the evening and the next day your scale model or product is finished.

Producing small series with a 3D printer

The current, traditional, production methods are mill-turn and injection molding techniques. For small batches, these techniques are very expensive. When you for instance only need 50 pieces of a certain part, it is much cheaper to print these yourself. Moreover, you have very little risk of stocks. You just turn on your printer and there the parts are.

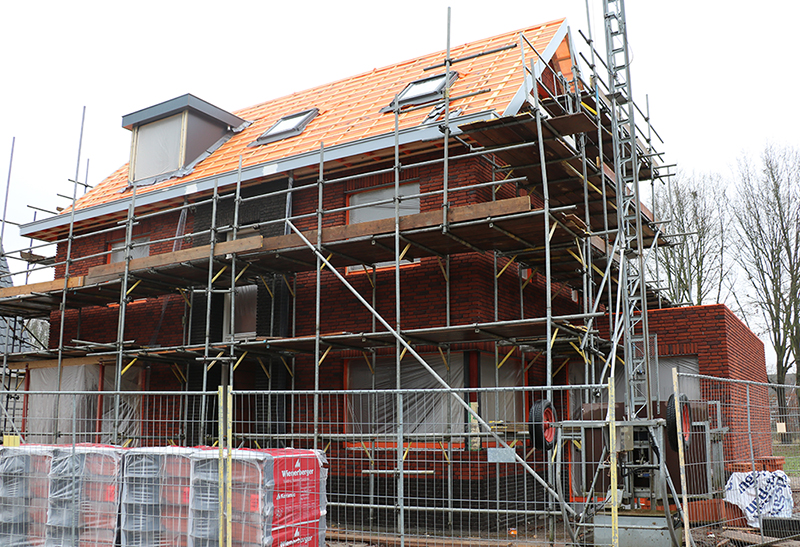
Printing ‘new’ shapes

Traditional manufacturing techniques are limited in making certain shapes. Hollow products, for example, are fine to produce with a 3D printer. This means that your designers have fewer limitations in the development and production process.

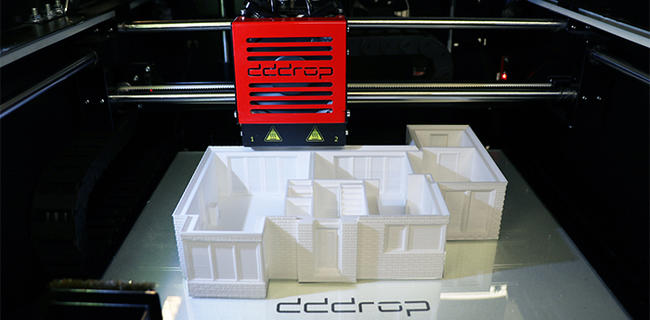
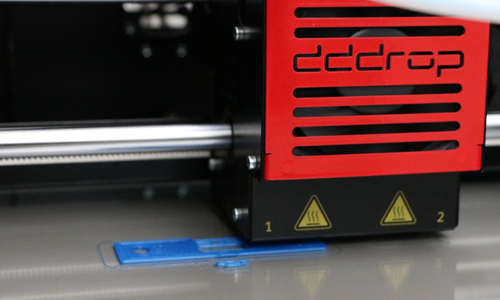
Curious what a 3D printer can do for your company, without a too big investment? Have a look at our dddrop RAPID ONE or contact us for an informal consultation: info@dddrop.com.

Why don’t my 3D printing layers merge properly?

Why don’t my 3D printing layers merge properly?

What does under extrusion mean for 3D printing?

If all the layers of your 3D print are not printed correctly, it is likely due to under extrusion. Under extrusion is a complex problem that can lead to missing layers or layers that are not fully printed, leading to gaps in the model. Unfortunately, we cannot pinpoint a single culprit. Under-extrusion can have several causes, which makes it difficult to determine the actual problem. It usually has to do with using the correct extrusion width.


Unfeasible extrusion width

When we talk about extrusion width, we mean the width of the printing layer that the printer extrudes. How wide or narrow this layer can be depends on the nozzle size used. The printer software has default values for how wide a layer can be for a given nozzle size (100% is the minimum extrusion width for each nozzle and 120% is the maximum). If you enter a layer value that is too thin or if you use the wrong nozzle, the layer cannot be converted to a printing layer and therefore will not print. This results in missing layers in your model. Check which extrusion width is to be used and that you are using the correct nozzle for this width. If you cannot obtain the desired width with any nozzle, the model will need to be adjusted in the CAD software. You can also manually adjust the extrusion values in the printer software, but the options are limited because it must be technically feasible.

Clogged nozzle

 When under extrusion occurs, you would expect the solution to lie in pushing more filament through the nozzle and thus adjusting the pressure. This is possible, but only to a certain extend and with the right temperature. When the pressure is too high, the chance of a clogged nozzle is very big.  Which in turn causes under extrusion to occur again, because the filament isn’t printed correctly anymore.

Under extrusion is an adhesion issue, that could be caused by an unfeasible extrusion width. The dddrop printers have changeable nozzles, which allows for a big range of extrusion widths that can be printed. Furthermore, dddrop delivers the right basic settings for each material which helps to achieve the best result possible.

Creating a strong infill for your 3D print

Creating a strong infill for your 3D print

Filling is an important factor

The infill is an important factor in your product’s strength. Therefore, it’s important to prevent the infill from being too thin or stringy with the tips underneath.

Different patterns:

There are several different infill patterns to choose from, and each leads to different degrees of strength. Examples of robust infills are lattice, triangular or solid honeycomb. Less robust are rectilinear and fast honeycomb infills. However, these less robust fills may still be preferred, as these types can be printed faster and are robust enough for most products.

Slower printing speed:

The infill is usually printed more slowly than other parts of the product. If the print speed is set too high, the nozzle cannot extrude enough material. Result: a thin and stringy infill that does not provide the proper strength. Therefore, try to lower the ‘Solid Infill Underspeed’ slightly so that the printer has enough time for a strong infill.

High infill extrusion:

For all products, the thicker the infill, the stronger the product. You can make the infill thicker by increasing the width of the grid. Set the Infill Extrusion Width to 110% to extrude more material and get a firmer grid. However, making the infill thicker means that more material is required and the printing process is slowed down. Therefore, you can simultaneously loosen the infill by placing the grids further apart. To do this, adjust the infill percentage in the slicing software.

Conclusion:

You want to print fast and not waste too much material, but you also want to give your product the right strength. It’s therefore important to find the right balance! Experiment with different infill patterns, the printing speed and the infill extrusion to achieve the result that meets your product requirements.

3D scale model of your new house

3D scale model of your new house

Printing your new house in 3D

Building your own house is an exciting project: What will it look like? Will it turn out the way you imagined? Sander Teunissen was in the middle of such a construction project and dealt with the same questions until dddrop printed a 3D scale model of his house.

The design 

When Sander and his wife bought the lot, they had the wish to design the house themselves, together with the architect. This way, they had the freedom to determine the layout and the angle of the light. Besides that, they decided to add solar panels and a heat pump. “You have no clue what you get yourself into,” Sander says. “ It takes a while before you can visualize the house, which makes it very exciting when the walls are finally being built.” To give Sander more insight into his future home, dddrop printed a 3D scale model based on the construction drawings. “It is a perfect replica and everything is in there, even the solar panels and roof tiles. The greatest thing is that you can disassemble every floor. This enables you to look inside the house and see the layout, even some furniture is there. It all comes to life with the scale model, we even made some small adjustments based on it,” Sander says delighted.

Eye catcher

Sander was not the only one who responded positively to the model. It also attracted the attention of others: “We’ve already had a few birthday parties and everyone responded absolutely thrilled. We also showed the model to our architect and contractor, they loved it as well of course!” Sander and his wife have two children and especially the eldest responded enthusiastic. Sander says: “The eldest is 5 and finds it very exciting that we are going to move. With the model, she has the ability to explain the layout and tell which room is going to be hers. The scale model is a success for the entire family and we gave it a prominent place in the house.”