How to prevent 3D print ghosting

How to prevent 3D print ghosting

What is ‘ghosting’ and what can I do to prevent it?

The side of 3D printed models are made up of hundreds of different layers. When everything is working optimally, these layers appear to be one because of the smoothness of the surface. But when something goes wrong during the placement of the layers, it is clearly visible on the outside of the print. The incorrect layers are presented in the form of lines or ridges on the side of the model. This can have several causes and one of them is ghosting. In this blog we will explain why ghosting occurs and how it can be avoided.

We speak of ghosting when the lines or ridges seem to repeat themselves across the surface of the 3D model. The imperfections created by ghosting appear after the curve and then slowly disappear. Usually the lines are quite subtle, hence the term “ghosting”. As a matter of course, one always strives to print the model as neatly as possible. Ghosting can make the appearance of a model less beautiful.

How ghosting occurs

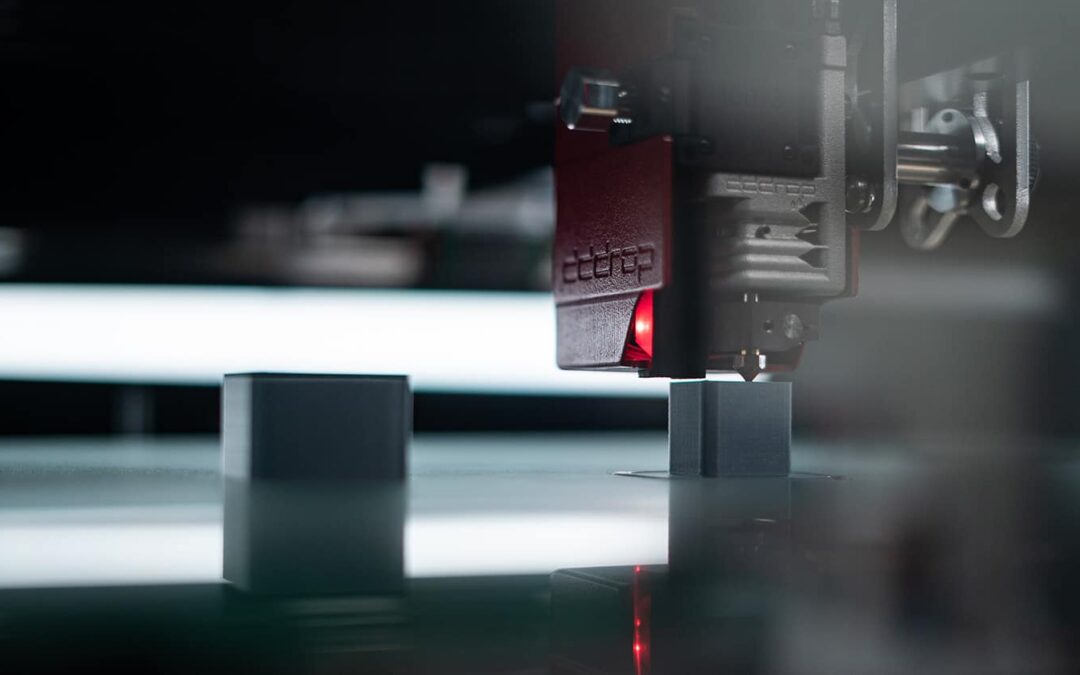
Ghosting is caused by vibration. In most cases, it happens when moving parts, such as a print head, have to suddenly change direction of movement. Therefore, it often happens with prints that contain sharp corners. Most printers have a uniform print speed, which means that the print head moves past these corners at the same speed and amount of material. But if it suddenly has to change its direction of movement, the material is printed too fast and does not spread out nicely. In addition, the mass of the print head combined with the rapid change in direction causes vibrations that are reflected in the model. Once these vibrations are gone, the layers are smeared evenly again.

How to prevent it?

To prevent ghosting, it is crucial to be efficient with the speed of the print head and the material. This means slowing down the print head in time and gradually, and printing less material before changing direction. For example, before a sharp turn. After the turn, the speed should be built up again gradually to avoid vibrations in the print head.
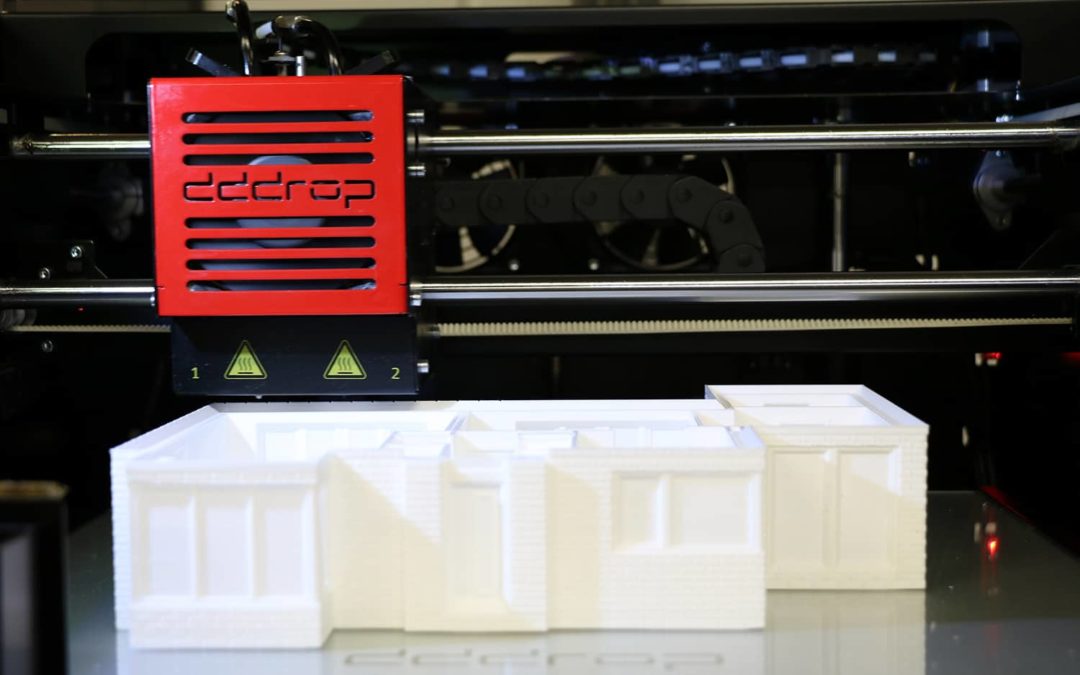
RAPID ONE

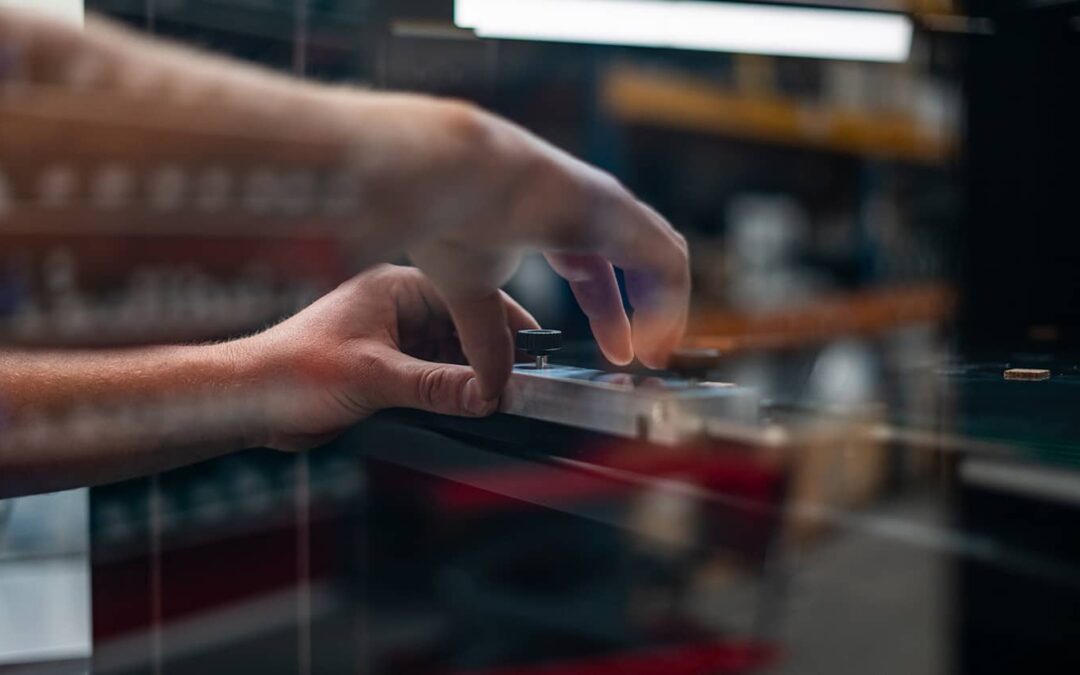
At dddrop we are constantly improving and optimizing the 3D printing process. When developing the new dddrop RAPID ONE, control over the speed of the print head was a key starting point. This resulted in perfect acceleration and deceleration of the print head, ensuring neat 3D print models and efficiency in print speed. The overall print speed can be increased significantly without compromising the quality of the 3D model, even those with sharp corners.

How to maintain your 3D-printer?

How to maintain your 3D-printer?

Maintaining your 3D printer

The first hours of printing are behind you and by now your 3D printer has become indispensable to your development and production process. Before you leave for home in the evening, you want to get the printer up and running quickly so that your prototype is waiting for you in the morning. There is nothing more frustrating than seeing an error and having your 3D printer become unusable. A 3D printer is a machine and (as with all machines) it is important to maintain it properly and on time. In this blog you will read practical tips and we will show you the possibilities dddrop offers in terms of service and maintenance.

The right environment for your 3D printer

The most important aspect for a long life of your 3D printer is the environment in which it is located. An office environment is preferred so that dust, dirt and other environmental factors cannot affect the printer. When a 3D printer is in a production environment, the risk of dust and other debris getting into the machine or onto filaments is significantly higher. This can, for example, cause the nozzle to become clogged as dirt collects here. In addition to dirt and dust, the ambient temperature is also important for the 3D printer. A room temperature (between 21ºC and 24ºC) results in the best prints and extends the life of the 3D printer.

Cleaning your 3D printer

You can place your 3D printer in a very clean environment, but you will still need to make sure that the 3D printer itself is clean as well. Thoroughly clean a clogged nozzle for the best results and life of your nozzle. Use a special stainless steel nozzle for rough fibers (such as PET-G Carbon). Also clean the printer bed thoroughly after each print, using an appropriate cleaning agent. Be sure to empty the filament waste bin regularly, and don’t forget any filament that has fallen to the bottom of the printer housing.

Maintenance schedule for your 3D printer

In addition to the things you can do yourself, it is also important to have the technical aspects of your printer checked. The dddrop 3D printers have a built-in maintenance schedule. This schedule is based on the number of print hours. When the 3D printer reaches 2500 hours, a maintenance key will appear on the screen. This is the time to give your printer a maintenance check. This maintenance can be performed by dddrop. Some parts are then replaced as a precaution so that your printer does not stall at a time when you do not expect it. Maintenance is also recommended at 5000, 7500 and 10,000 print hours, to replace other wear parts.

3D printing with support material

3D printing with support material

When do you need to 3D print with support material?

The great advantage of 3D printing is that it allows you to print very complex models that are difficult to produce with other techniques. For example, think about printing an overhang. Because 3D printed parts are made up of layers, you always need an underlying layer to build on. So depending on the complexity of the 3D model, you may need to work with supporting structures. Below we explain the possibilities.

An FDM 3D printer can (in most cases) print an overhang with an angle below 45° without the need for support. A tip here: reduce the layer height, for example from 0.2 to 0.1mm. The printer will now produce twice as many layers, allowing the printer to take smaller steps when creating an overhang. For angles greater than 45°, it is advisable to support the 3D model. This can be done in three ways:

  • Support with the original material
  • Supporting with PVA filament
  • Supporting with PVA+ filament

Supporting with the original material

We’ll start with the easiest and fastest way to support your 3D print. Moreover, it is the only option if you print with one extruder. In this method, the required support is printed from the same material as the model. This method works easily because you only need one material. A slicing software package, such as Simplify3D, can generate these support structures. Note that it is important not to use too much support material, because support structures of the same material are more difficult to remove from the model than the other options.

Supporting with PVA filament

There are special support filaments available that are completely soluble. PVA is one of them. To print with PVA, you need a 3D printer with a dual extruder.

PVA stands for polyvinyl alcohol and is a soft and biodegradable polymer that is very sensitive to moisture. When PVA is exposed to water, it will dissolve. Therefore, it is perfect as a carrier material for 3D printing. After printing, the filament can be easily removed by dissolving it in cold or lukewarm water. PVA is often used in conjunction with PLA filament, but is now increasingly being applied to other filaments such as PET-G. In addition, there are several new modifications that make it possible to use PVA with higher temperatures. For example, we are talking about PVA+.

Supporting with PVA+ filament

Previously, HIPS was mainly used as a support material for printing in ABS. With the advent of PVA+, HIPS is used a lot less. The reason for this change is that HIPS must be dissolved in limonene. This is a difficult to obtain, chemical. Therefore, HIPS is often replaced by PVA+ (modified PVA), a fiber that is easily soluble in water – just like PVA. PVA+ also requires the use of a dual extruder.

The major advantage of printing with support material is that it is easily removed without leaving parts behind or damaging the 3D model. A disadvantage is that support filaments are often more expensive than the base filament and can only be printed on a 3D printer with a dual extruder. dddrop also sells its own support material for the best printing results.

3D design and 3D printing

3D design and 3D printing

How to design and print a perfect 3D model?

That engineer is a special and great profession needs no further explanation. All objects around us were once developed by an engineer. For years we all produced mainly with the well-known techniques such as mill-turning or injection molding. Meanwhile, the 3D printer has made its appearance in the manufacturing industry and this also requires a change in development: designing for a 3D print requires a new way of thinking.

With traditional techniques, development usually starts with a piece of material from which parts are removed until the desired product is achieved. With 3D printing, development begins with an empty space. This empty space is the engineer’s new starting point, as the 3D model is built from layers. What does this mean for the design and printing process?

Making a 3D model

First of all, we require a 3D drawing of the product or part. There are several 3D CAD software packages available for creating the 3D design, like SOLIDWORKS. You can learn how to draw simple models relatively quick, there are various trainings available that teach the basics.

Make it 3D printable

When the 3D drawing is ready, it needs to be converted into a printable 3D file: a so-called .STL file. Several software packages, like Simplify3D, convert 3D drawings into a layer-based model. You basically don’t need to do anything about it, but of course it is possible to adjust some settings to tailor it to -for instance- the material (filament) you’ll be using.

Important aspects to take into account during the design and printing process are:

Thin walls

It sometimes happens that models are scaled to a different size. When scaling down, it could happen that the walls become too thin to be printed. Most 3D printers have a set nozzle (printer head) size with a diameter of 0.4mm. Although this works fine for most models,
problems could arise when layers smaller than the nozzle size need to be printed. When a wall of 0.2mm has to be printed with a 0.4mm nozzle, this thin wall will not be shown in the Simplify3D preview and not be printed. Read more about printing thin-walled products.

Tip: always scale in the CAD program (instead of the slicing software) for the best result.

Support material

Support materials like PVA or PVA+ are often used with 3D printing. These filaments are soluble and enable printing hollow or other complex forms. The angle in which a 3D printer can work without support material is 45 degrees. Every lower angle, so from 0 until 44 degrees, has to be supported. Also when printing for instance a screw thread, support material is required. Read more about printing with support material.

Assemblies

Complete assemblies can be 3D printed in one go, provided that the printer bed is big enough for it. To print an entire assembly, it’s important that the complete assembly is saved as one .STL file.

Bridging

A 3D printer can easily print bridges up to 5 mm. For bridges from 5 to 15 mm, some adjustments in the slicing software are required. The big advantage of printing with plastic filaments, is that it will tighten when it cools down, as the material shrinks a little.

Tolerance

When printing two parts that need to fit together, like a bolt/nut construction, you need to take the shrinking of the material into account. It’s usually enough to use a tolerance of ±0.1mm, but this can differ per model.

How thin can a 3D printer print?

How thin can a 3D printer print?

How thin can a 3D printer print?

Explore the limits of 3D printing technology as we delve into the question: how thin can a 3D printer print? This guide unfolds the intricacies of achieving fine prints, shedding light on nozzle sizes, wall thickness, and the tweaks that can make all the difference.

With FDM printing, a model is constructed by printing layers of filament (plastic). This filament is heated until it melts and is then guided through the nozzle of the printer. The width of the layer that is printed onto the print bed is partly determined by the size of the nozzle. Several sizes are available, to enable printing different wall thicknesses (extrusion widths). When printing thin-walled models, it’s good to know how this exactly works. When the wrong settings are used, it could happen that a wall isn’t constructed correctly or not even printed at all. This often happens when models are scaled down.

how thin can a 3d printer print

Different nozzle sizes

The various nozzle sizes can be used for different purposes. Do you want a model to be printed quickly, without paying too much attention to the details? Then choose a big nozzle size like 1.0mm. This nozzle prints a wide and high layer, resulting in less required layers and therefore a quicker result. However, if you want to print a detailed or thin-walled model, you should choose a smaller nozzle, like 0.2 or 0.4mm.

Too thin walls

Sometimes, models need to be scaled to a different size. This can be done in the CAD program, but also in slicing software like Simplify3D (which is software that converts a 3D model into a printable file). To acquire the best result, it’s advisable to always scale a product in the CAD program. When scaling down a model, it could happen that walls become too thin to be printed. Most 3D printers have a set nozzle size with a diameter of 0.4mm or 0.5mm. Although this works for most models, problems could arise when layers smaller than this nozzle size need to be printed. When for instance a 0.2mm thick wall has to be printed with a 0.4mm nozzle, this wall will not be shown in the Simplify3D preview and not be printed. There are two possible ways to ensure these walls will be printed (correctly).

Change the design

Firstly, the model can be changed in the original CAD program. Make sure the walls are at least as big as the nozzle size. The walls can also be a bit bigger than the nozzle, 20% at the most. When all walls have been adjusted, the model can be imported into the slicer software again.

Change the nozzle

The second solution is to install a smaller nozzle. The dddrop 3D printers have been built in such a way that it’s easy to change the nozzle. You can choose from nozzles in the sizes 0.2, 0.4, 0.6, 0.8 or 1.0mm. This enables you to print with a high speed as well as detailed thin-walled products.

Material Considerations for Thin Printing

The choice of material significantly impacts how thin a 3D printer can print. Different materials have distinct melting points and flow characteristics. For instance, PLA is easier to print thin compared to ABS due to its lower melting point and less warping. It’s crucial to choose a material that flows smoothly at the set printing temperature, adheres well to the print bed, and solidifies quickly to maintain the thin structure. Experimenting with different materials and noting their behavior helps in mastering thin printing, ensuring the desired precision and quality in your projects.

Software Settings for Optimized Thin Printing

The role of software settings is indispensable when exploring how thin a 3D printer can print. Key settings include layer height, wall thickness, and printing speed. A lower value for layer height results in finer layers, while the wall thickness setting ensures the structural integrity of the model. Slowing down the printing speed allows for more accurate material deposition, which is crucial for achieving thin prints. Mastering the interplay of these settings in your slicing software is a significant step towards successful thin printing endeavors, leading to higher precision and quality in your projects.

Common Challenges and Solutions in Thin Printing

Venturing into thin printing presents unique challenges. Common issues include nozzle clogs, warping, and adherence problems, mainly when working with materials that contract upon cooling. Addressing these challenges entails regular maintenance to prevent nozzle clogs and optimizing bed temperature to enhance adhesion and reduce warping. Additionally, employing a heated print bed and an enclosure can provide a stable printing environment, mitigating the effects of rapid cooling. By understanding and addressing these challenges, one significantly improves the chances of achieving successful thin prints, marking a stride towards mastering the art of thin 3D printing.

Conclusion

As we’ve navigated through the aspects influencing how thin a 3D printer can print, it’s evident that the right balance of hardware, software, and knowledge is crucial. Whether you’re scaling down a model or choosing the perfect nozzle, every detail counts towards achieving those precise, thin prints.

FAQ

How thin is too thin for a 3D printer?

The minimum thickness a 3D printer can achieve is determined by its hardware, particularly the nozzle size. For a standard 0.4 mm nozzle, the thinnest line it can technically print is 0.24 mm, which is achieved by adjusting the line width parameter in the slicing software​. There are experimental settings in some slicing software like Cura that might allow for printing thinner walls, but they come with their own set of challenges​.

What is the thinnest layer a 3D printer can print?

The thinnest layer height, or Z resolution, is typically around 0.025 mm or 25 microns for SLA 3D printers, and around 0.1 mm or 100 microns for FDM 3D printers​.

Is 0.2 mm good for 3D printing?

A 0.2 mm layer height is a common setting for FDM 3D printers when a balance between detail and printing time is desired. It provides a good level of detail while not being as time-consuming as finer layer heights like 0.1 mm.

What is the minimum line thickness for 3D printing?

The minimum line thickness for 3D printing is often equated to the nozzle diameter of the 3D printer. For instance, with a 0.4 mm nozzle, a minimum line width of 0.24 mm is achievable.